- Software Working Process
- User Interface
Software Working Process
1: Download, install, and open the CloudXena PST Viewer application on your Mac system.
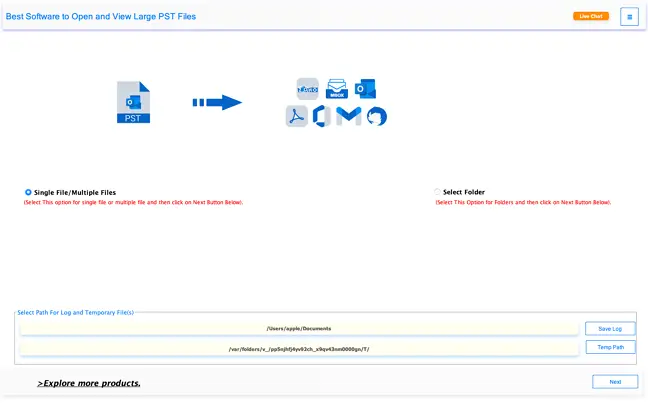
2: Now, choose between the Select File/ Multiple Files or Select Folder option and click Next.

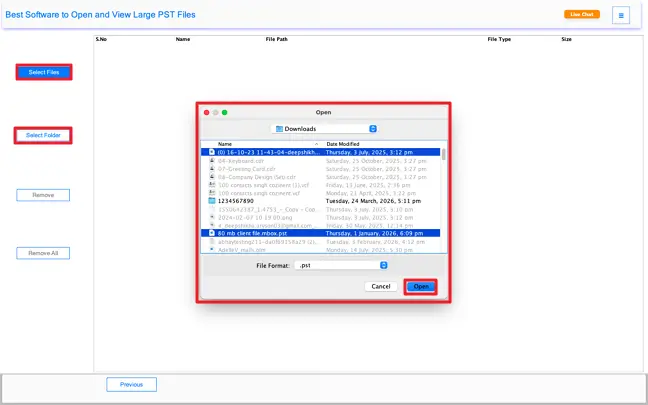
3: Click on the Select Files or Select Folder option to import the PST files you want to preview and convert, then click Open to proceed.
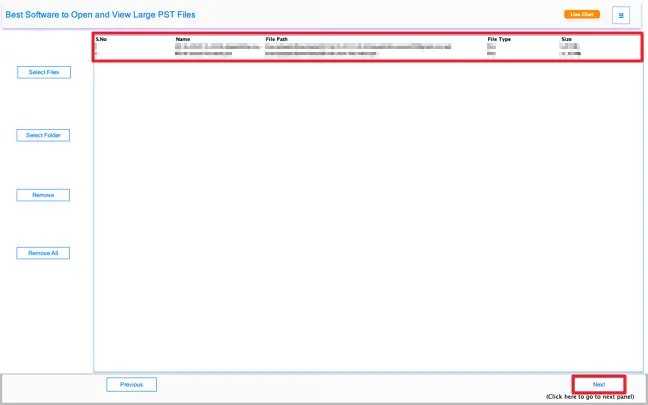
4:Once you have selected the required PST file, click Next to proceed to the next step.
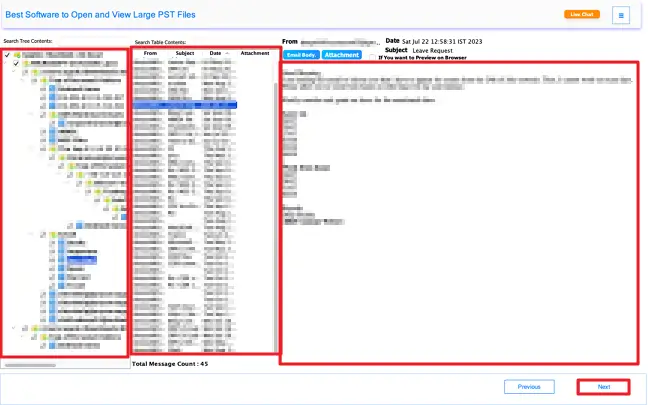
5: The software will display the mailbox data in a structured tree view on your screen.
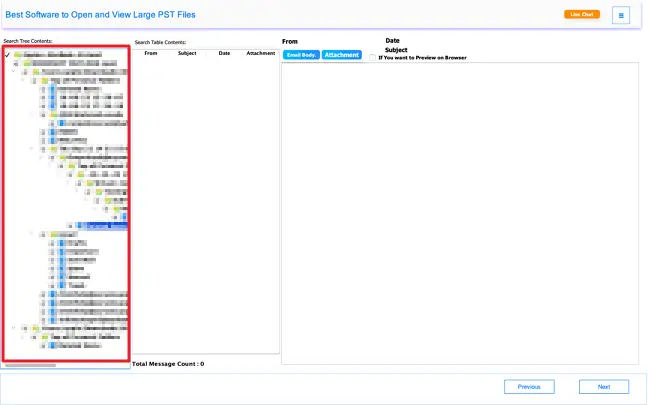
6: Choose the desired mailbox item to preview its contents along with attachments, then click Next to continue.
7: Select PDF or any preferred file format from the Save/Backup/Migrate As options provided.
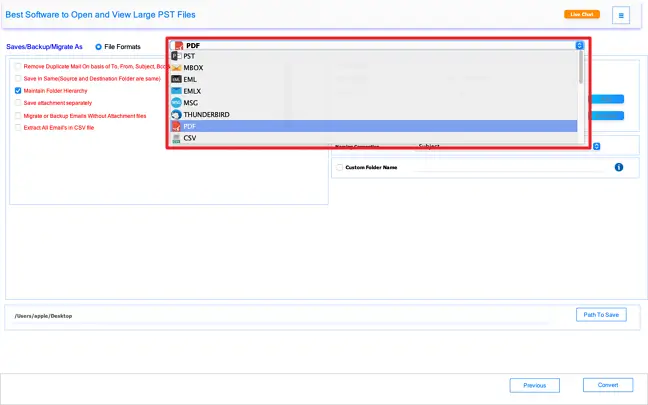
8: Use the available filter options to refine your conversion process:
- Remove Duplicate Mail: Eliminates repeated emails based on To, From, Subject, Bcc, and Body fields to avoid redundancy.
- Save in Same/Source and Destination Folder Maintains the original folder structure during the export process.
- Maintain Folder Hierarchy Keeps the mailbox folders organized exactly as they appear in the PST file.
- Save Attachment Separately: Downloads and saves attachments in a separate folder for easy access.
- Migrate or Backup Emails Without Attachment Files: Excludes attachments and processes only the email content, reducing file size.
- Exclude All Emails in CSV File: Skips email data and focuses only on selected metadata if needed.
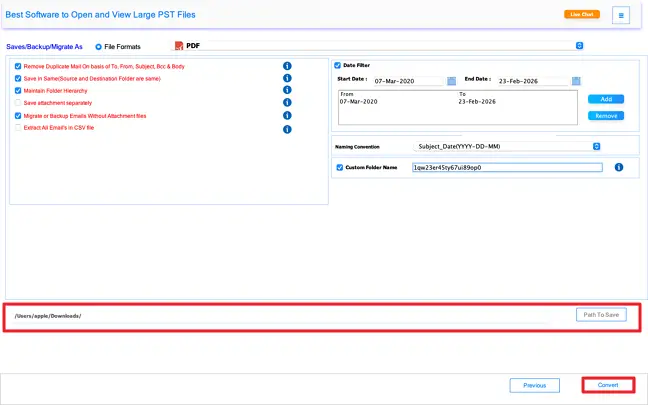
- Date Filter: Set a specific date range (Start Date to End Date) to export only the required emails.
- Naming Convention: Choose a preferred naming format (e.g., Subject_Date) for the output files.
- Custom Folder Name: Define a custom name for the destination folder where the converted files will be saved.

9: Click on Path to Save to select the destination location where you want to store the converted files. After choosing the desired folder, click Convert to begin the conversion process.
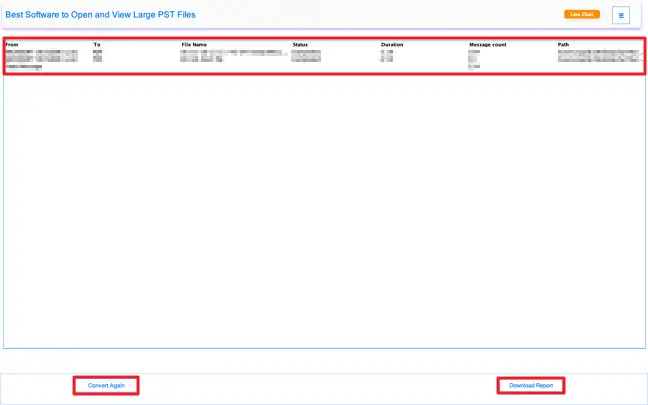
10: Once the conversion is completed, the software will display a detailed status report including file name, processing status, duration, and message count. You can review the results directly on the screen.
Click Download Report to save the conversion summary for future reference, or select Convert Again if you wish to process more files.
Activate the Software
Installation & Uninstallation
Download the step-by-step installation or uninstallation PDF guides below:
Windows Installation Windows UninstallationUser Interface
Download, install, and open the CloudXena PST Viewer application on your Mac system.