- Software Working Process
- User Interface
Software Working Process
1: Download and install the CloudXena Duplicate File Finder on your system. Then, run it as an administrator.
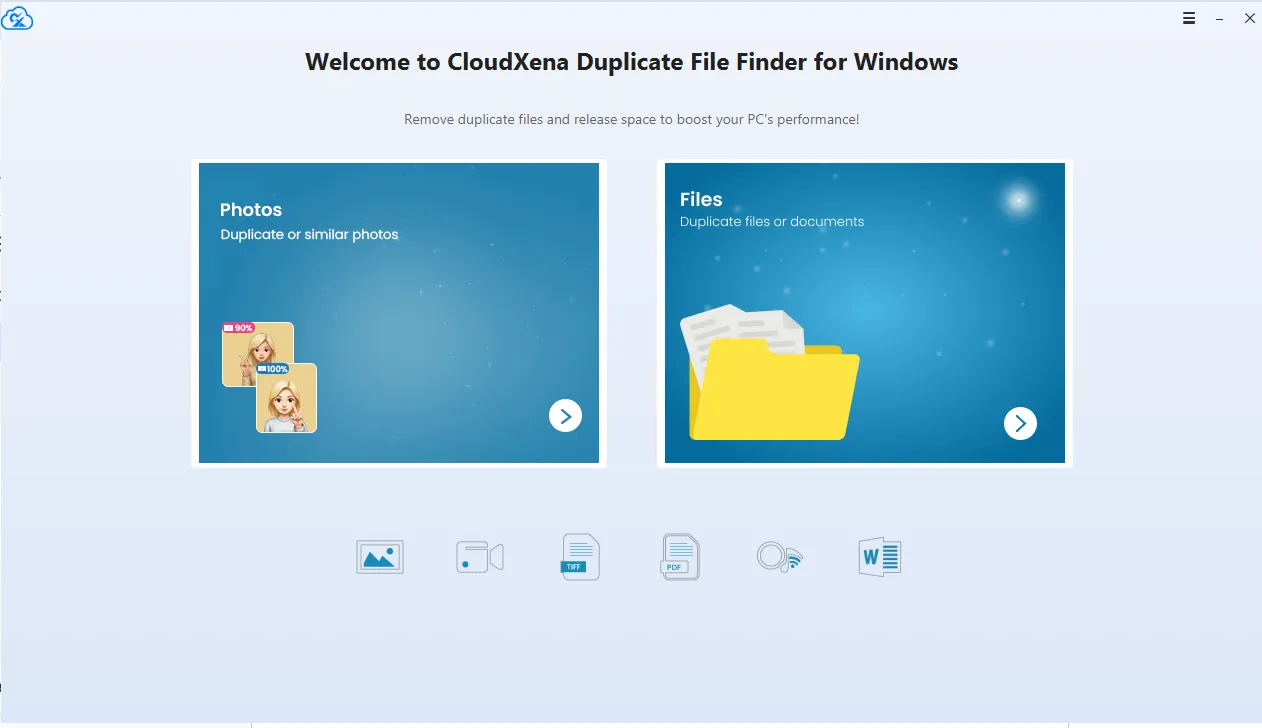
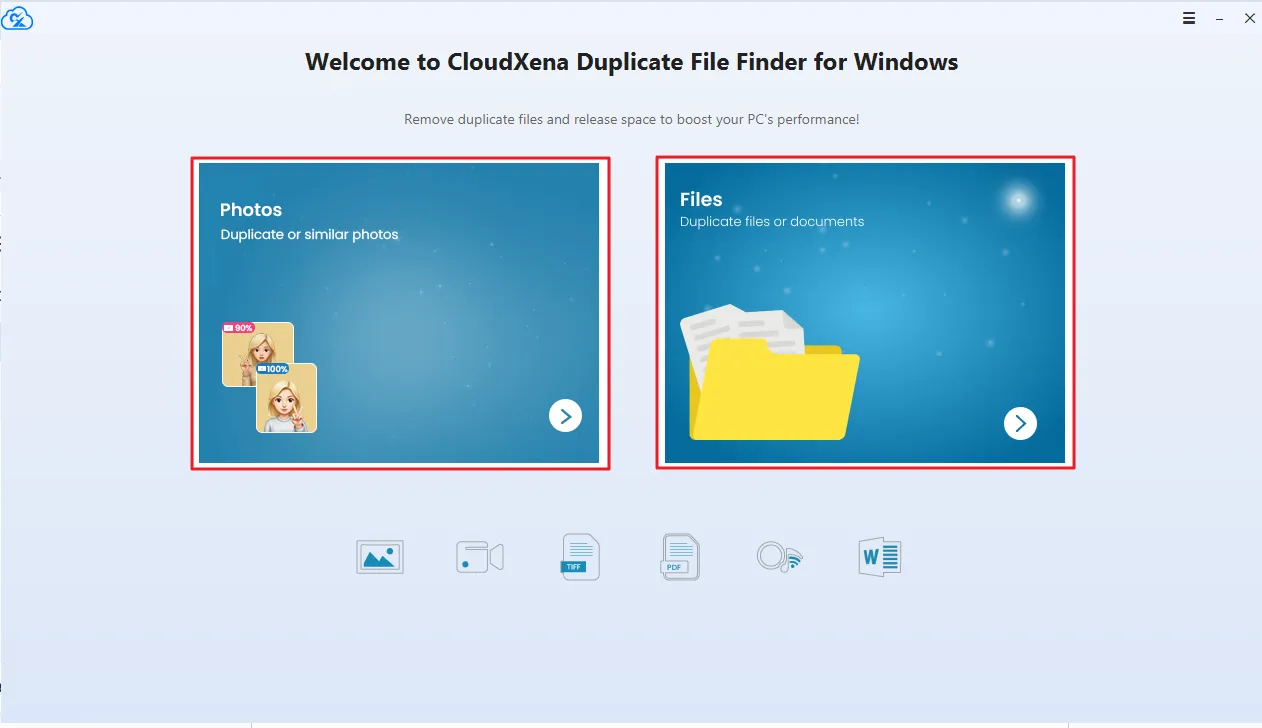
2: Choose the type of data you want to scan:
- Photos (Duplicate or Similar Photos): Detects and removes identical or similar-looking images.
- Files (Duplicate Files or Documents): Find and remove duplicate files or documents of different formats.
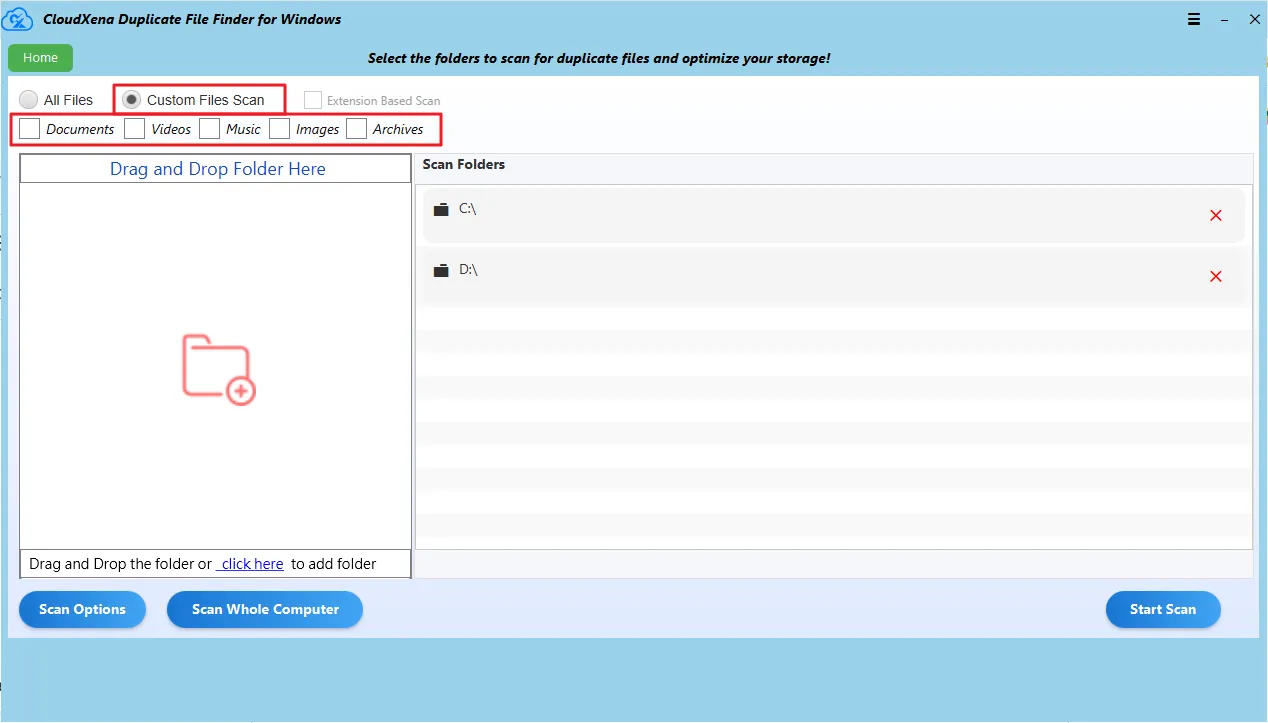
3: Select a scanning mode based on your need:
- All Files: Scans all files in the selected folders.
- Custom File Scan: Scans only specific file types such as Documents, Images, Music, Videos, or Archives.
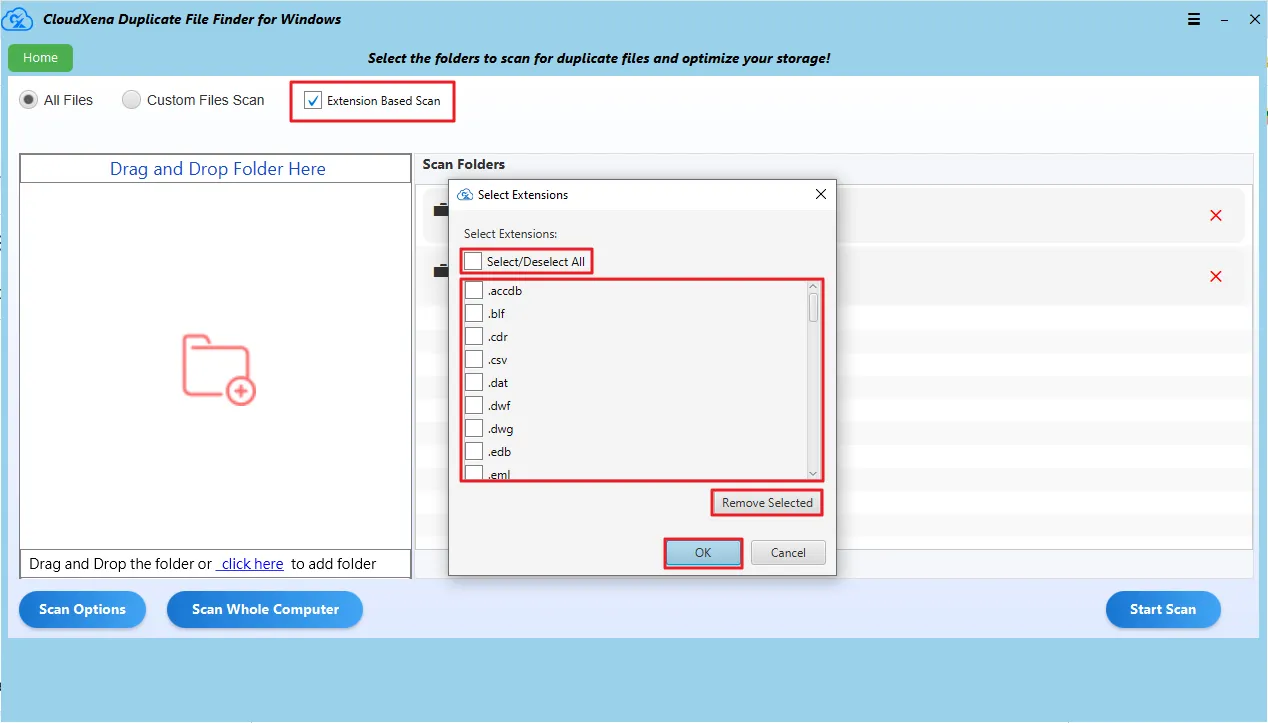
- Extension-Based Scan: Searches duplicates based on a specific file extension.
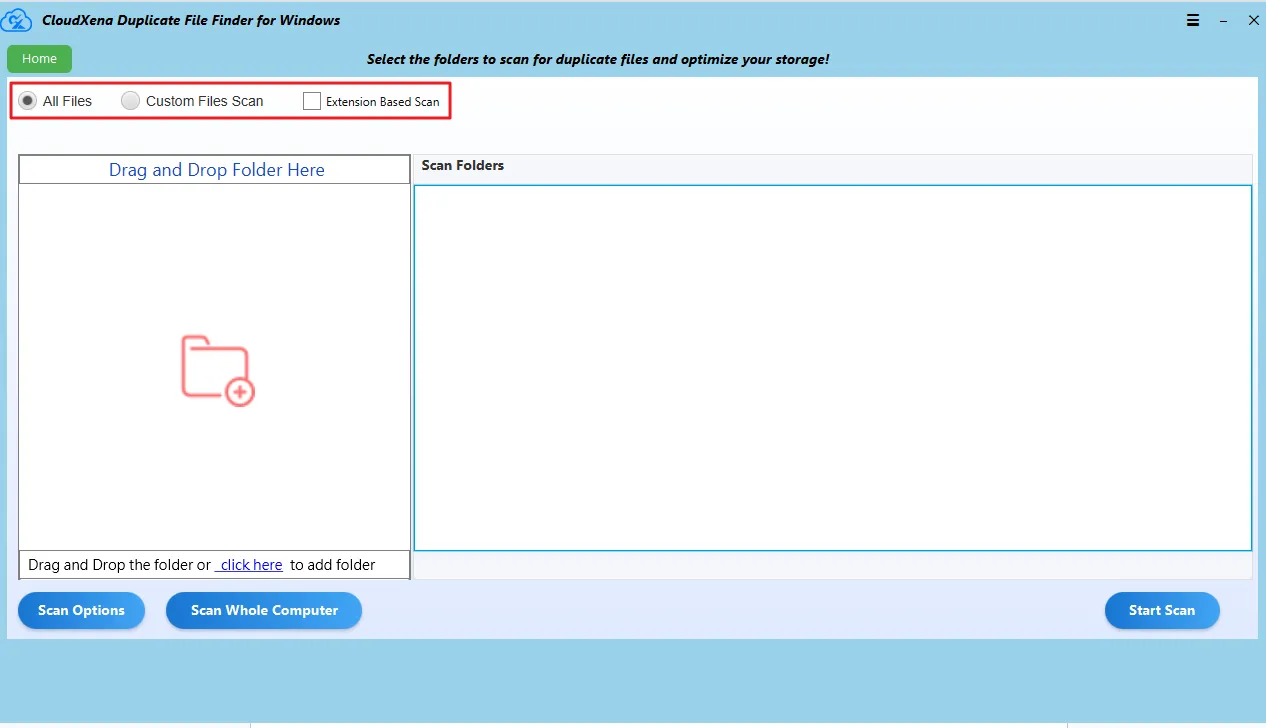
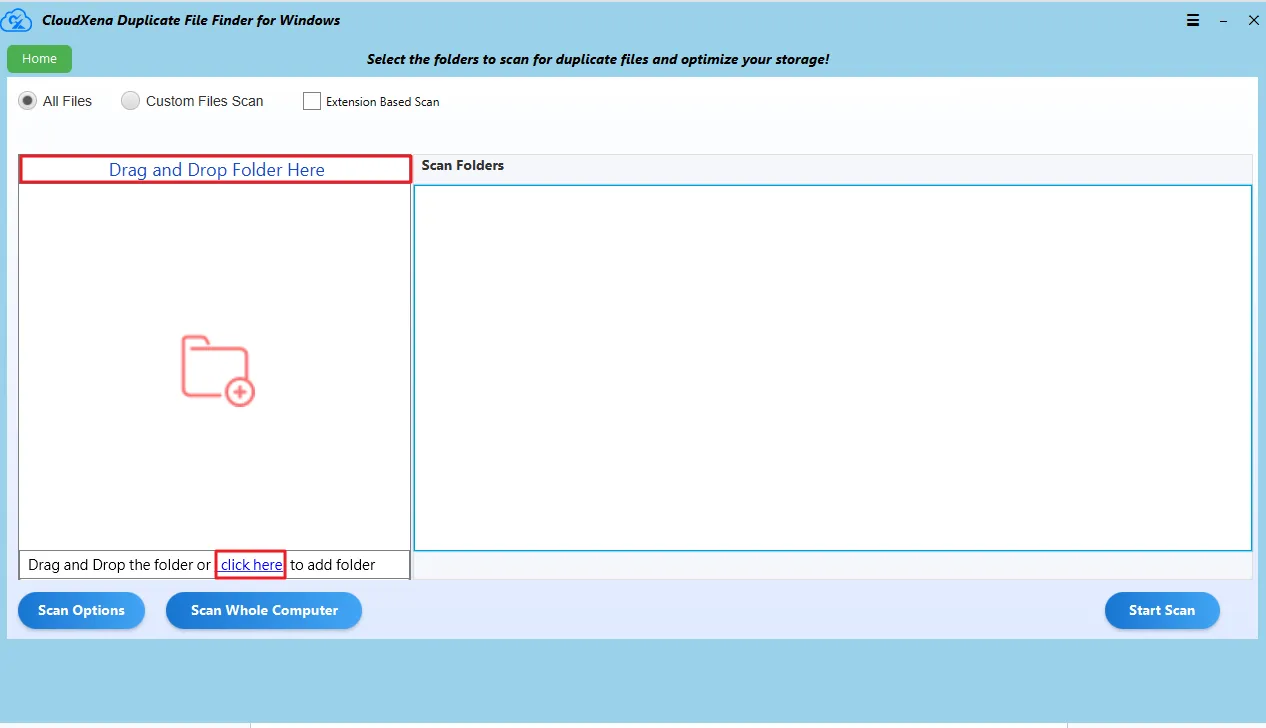
4: Add your files or folders using any of the following options:
- Drag & Drop: Simply drag files/folders into the software window.
- Click Here Button: Click this button at the bottom to browse and add files or folders manually.
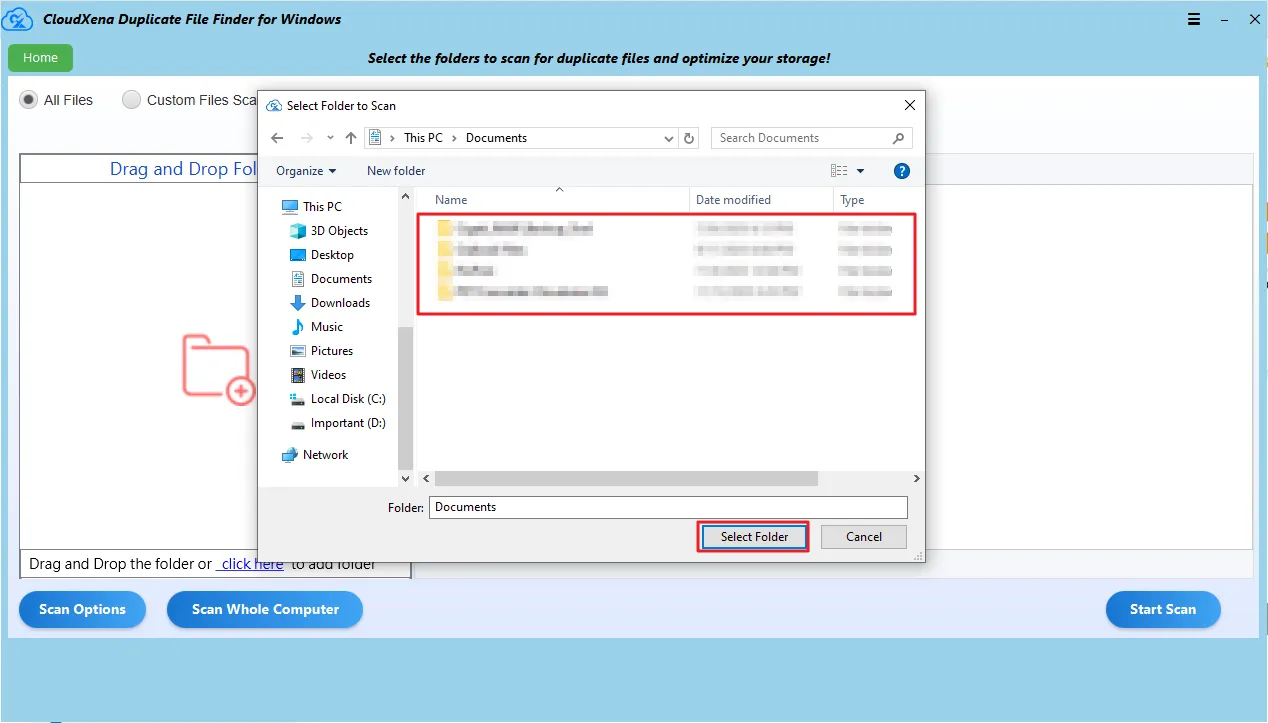
5: Browse your system to locate the desired folder, select it, and click Select Folder to upload your data.
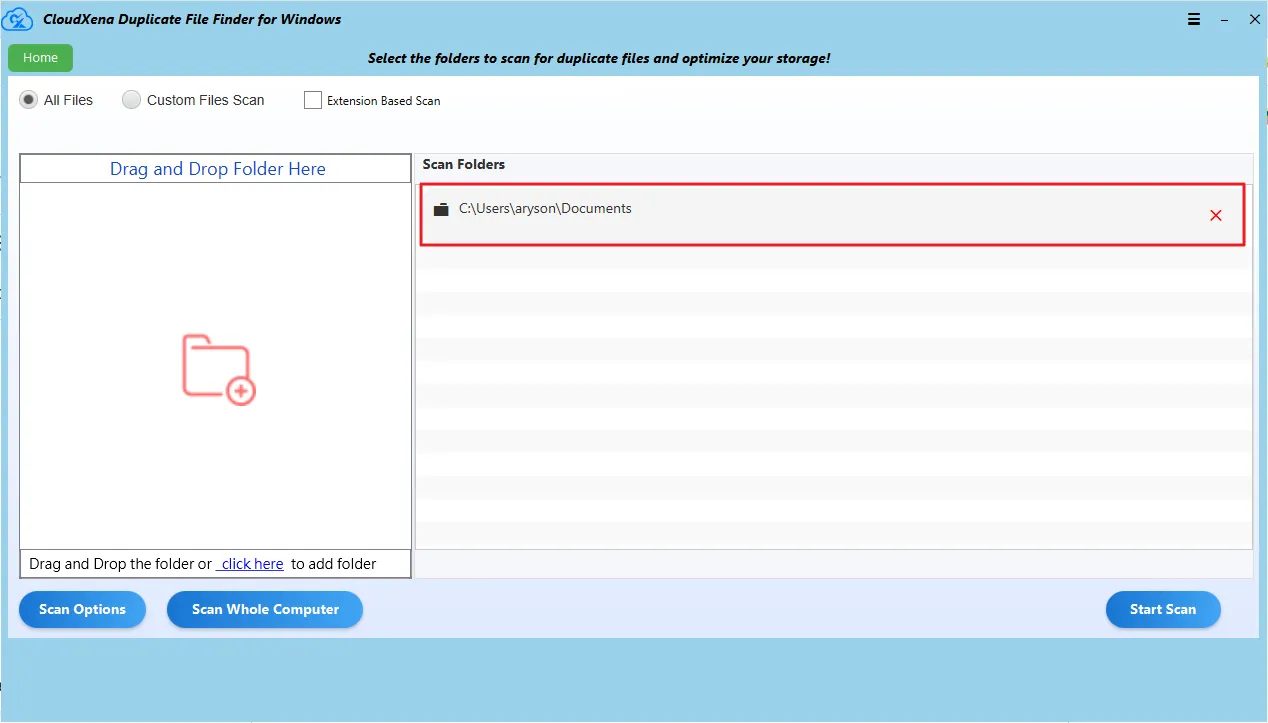
6: You’ll now see the uploaded folder listed in the software. You can add more folders if needed.
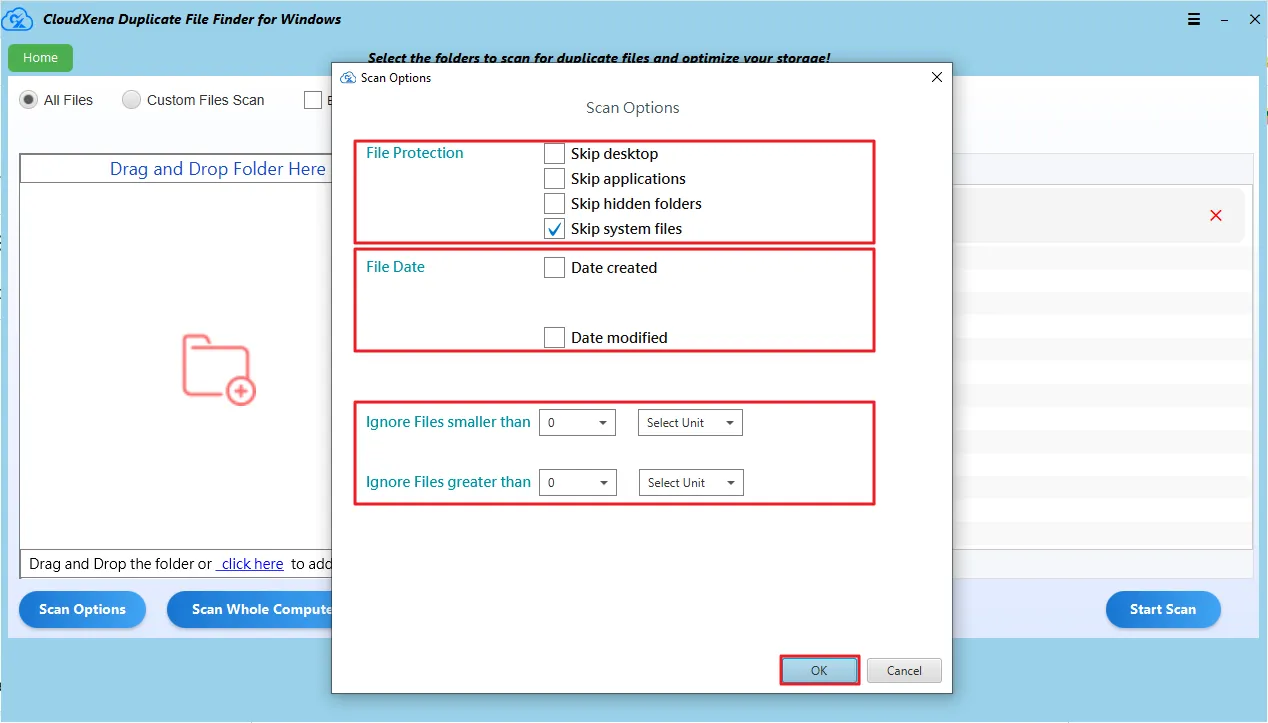
7: Click Scan Options to customize your scan using the following filters:
- File Protection: Exclude system, hidden, desktop, or application files.
- File Date: Scan based on creation or modification dates.
- Size Filters: Include or exclude files based on file size (MB/KB/GB).
Click OK to save your preferences.
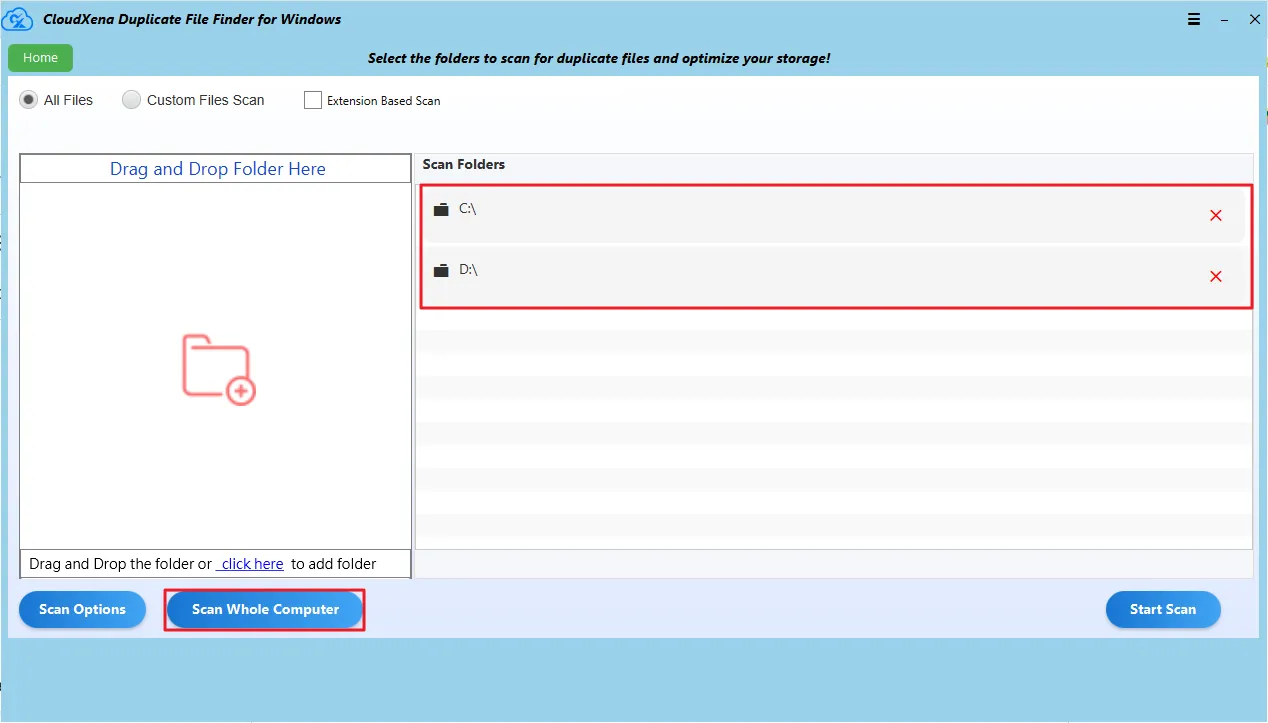
8: Select Scan Whole Computer if you want to run a full system-wide scan to detect duplicates across your entire PC.
9: Click Custom File Scan to load files of specific categories such as Documents, Images, Videos, Music, or Archives.
10: Enable Extension-Based Scan to find duplicates based on file extensions like .csv, .pdf, .dbf, .docx, .xlsx, .pst, etc.
You can:
- Select/Deselect All extensions.
- Choose extensions manually.
- Remove unwanted ones using Remove Extensions.
Click OK to continue.
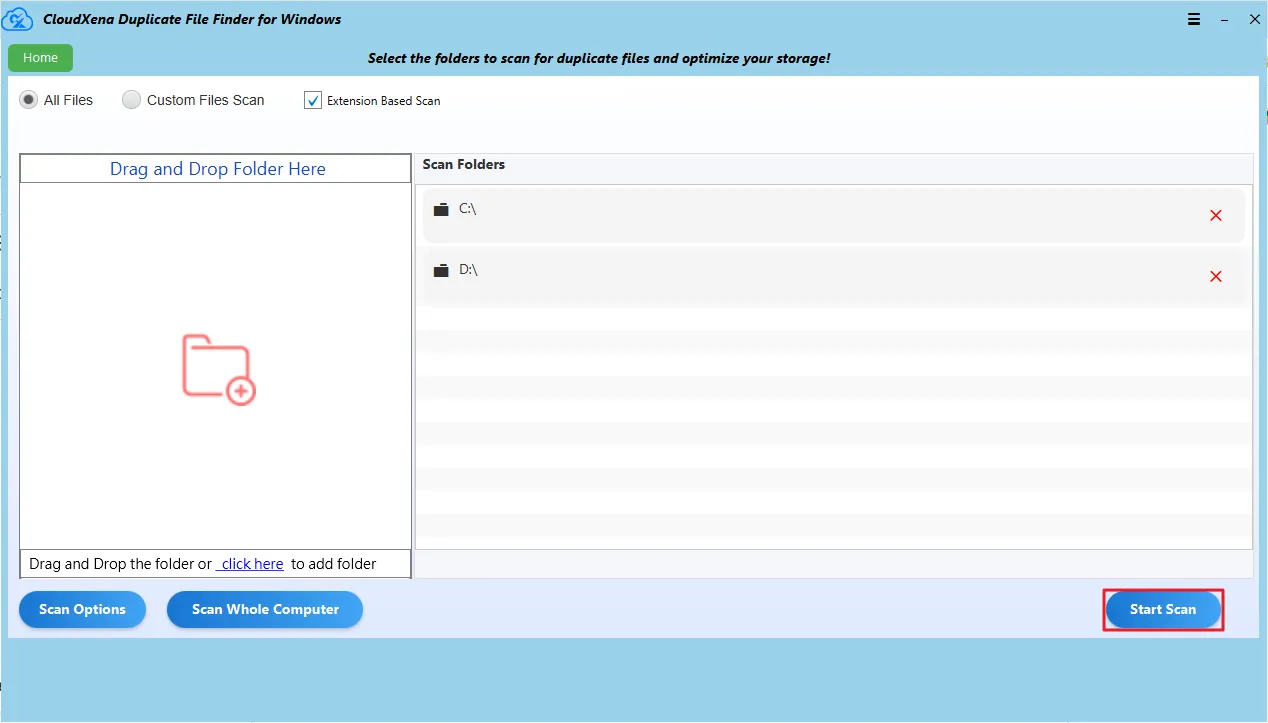
11: After setting all filters and preferences, click Start Scan to begin scanning your selected files and folders.
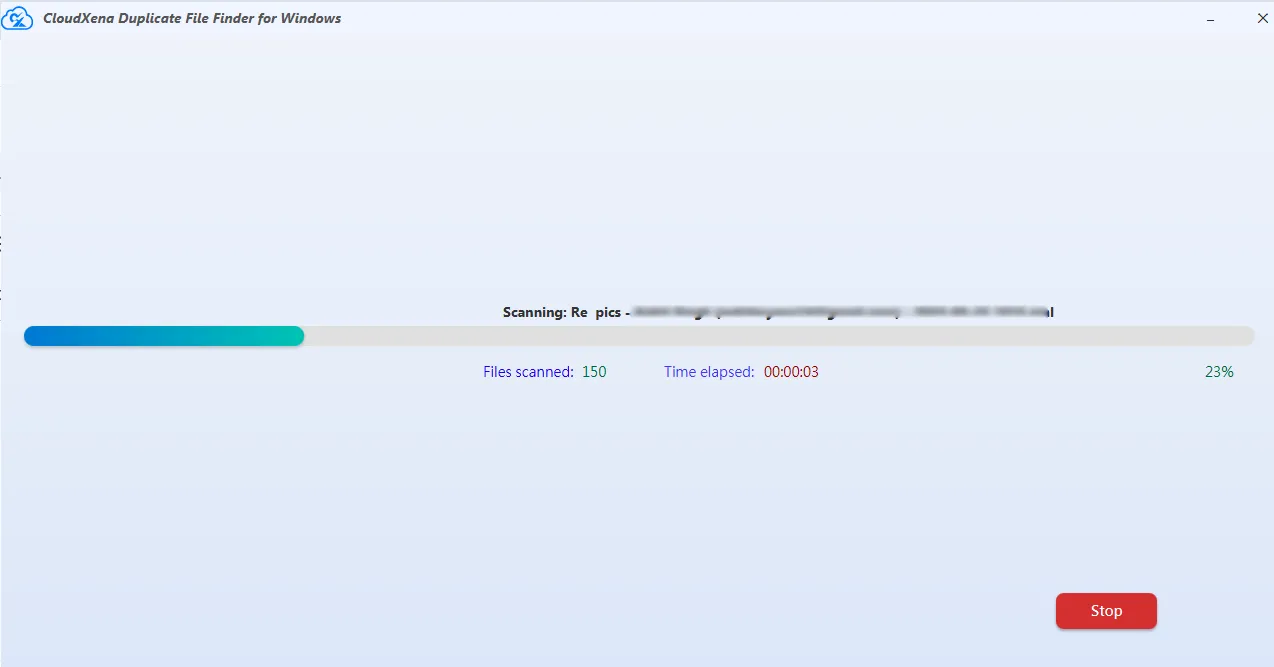
12: The software will now scan for duplicate files. Wait until the process completes. If needed, you can stop it at any time using the Stop button.
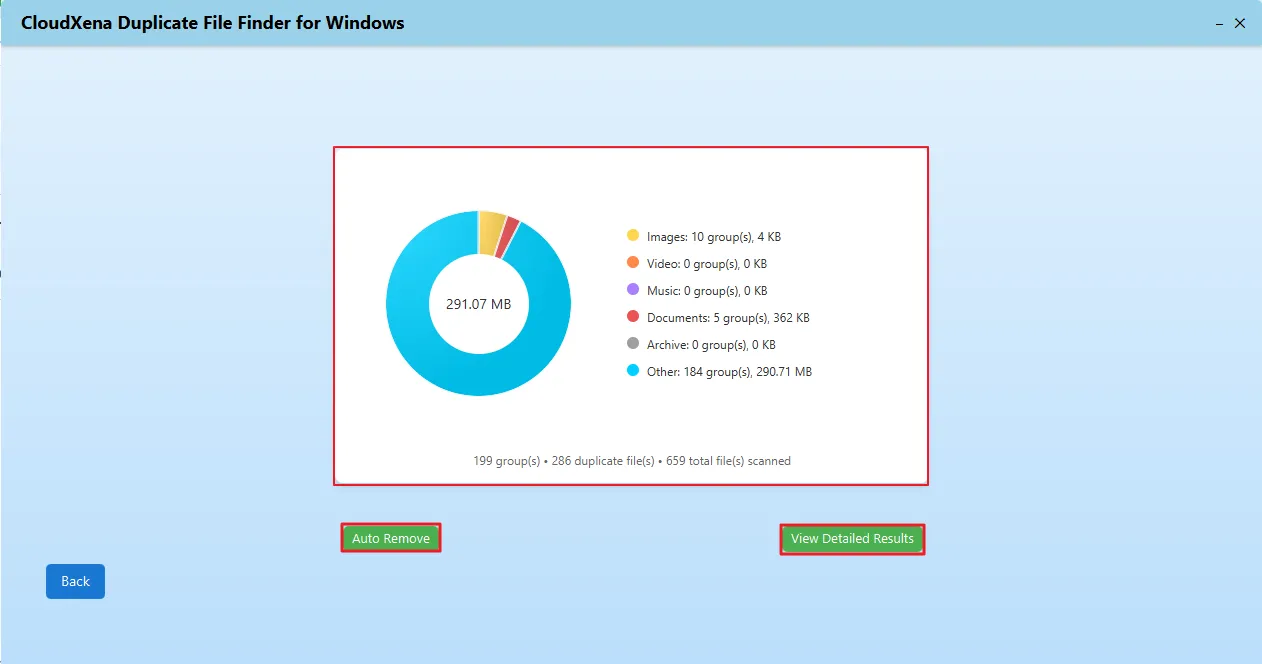
13: Once the scan completes, view a summary of the detected duplicates. You can choose:
- Auto Remove: Automatically delete duplicates (Delete Permanently, Move to Bin, or Move to Folder).
- View Detailed Results: See a detailed list of duplicate files for manual review.
14: Click View Detailed Results to view duplicates categorized for better understanding and selection.
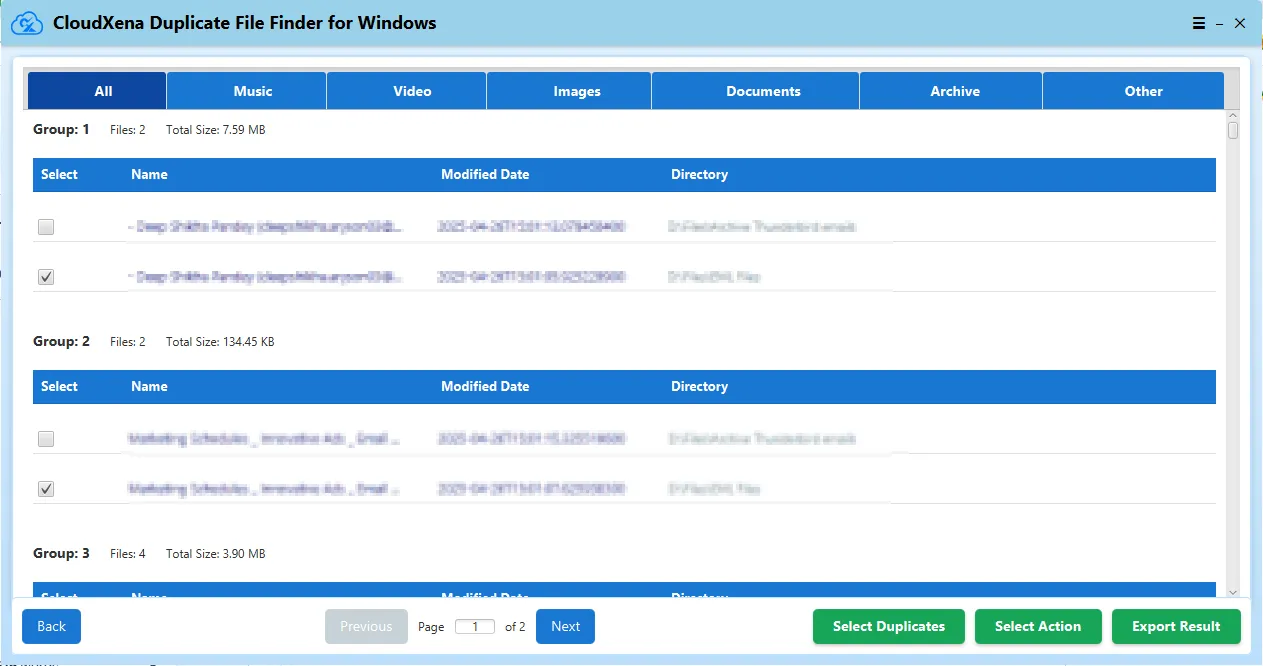
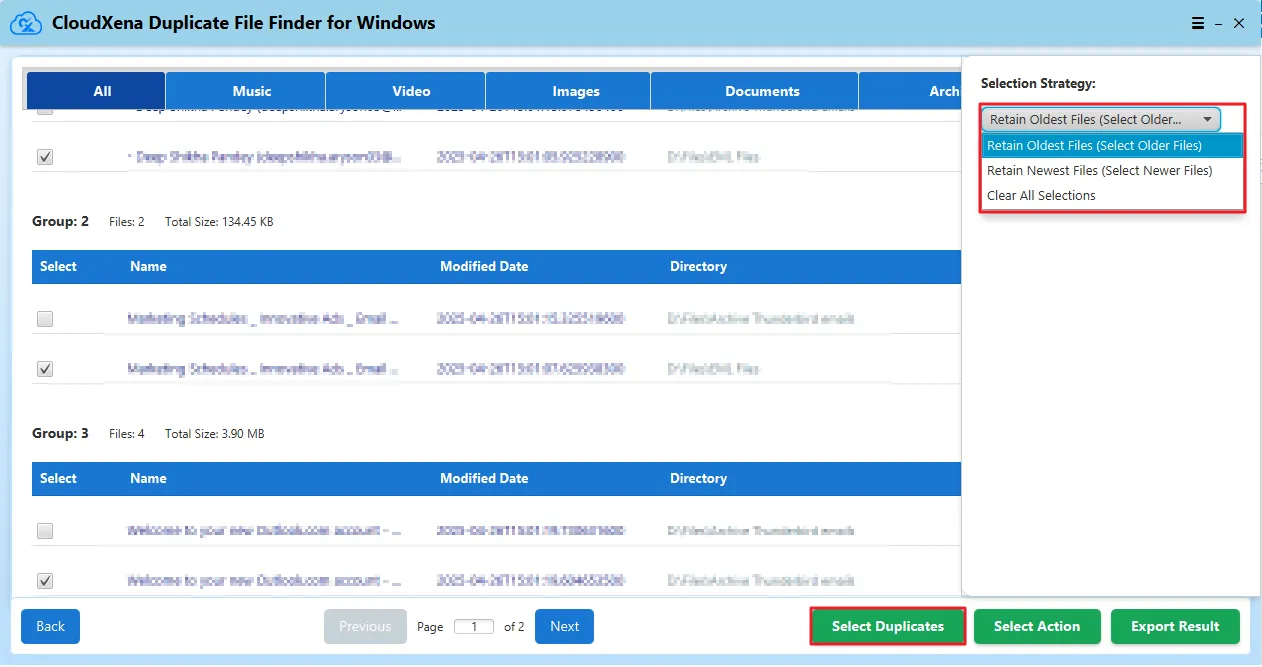
15: Click Select Duplicate to decide which files to keep or delete:
- Retain Oldest Files (Select Older Files): Keeps the earliest version.
- Retain Newest Files (Select Newer Files): Keeps the latest version.
- Clear All Selections: Deselects all for manual selection.
Click Apply to confirm your choice.
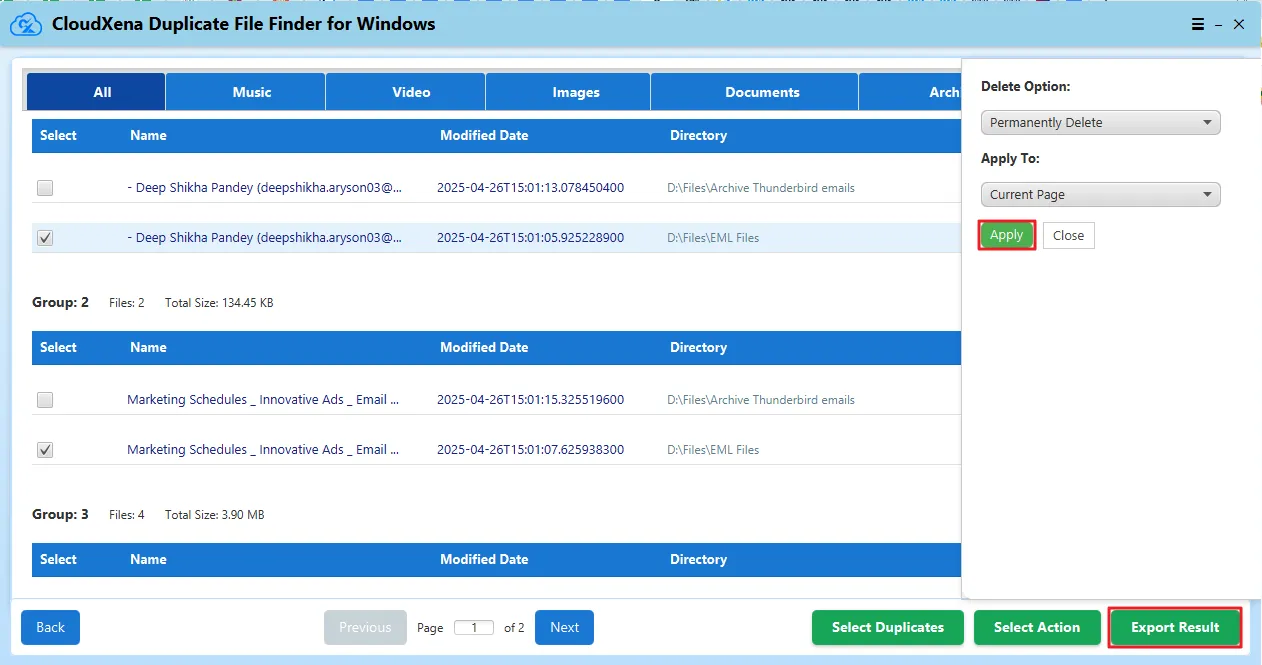
16:Click Select Action to choose what to do with the selected duplicates:
- Permanently Delete: Erase duplicates.
- Move to Bin: Send duplicates to the system Recycle Bin.
- Move to Folder: Move duplicates to a specific folder for later review.
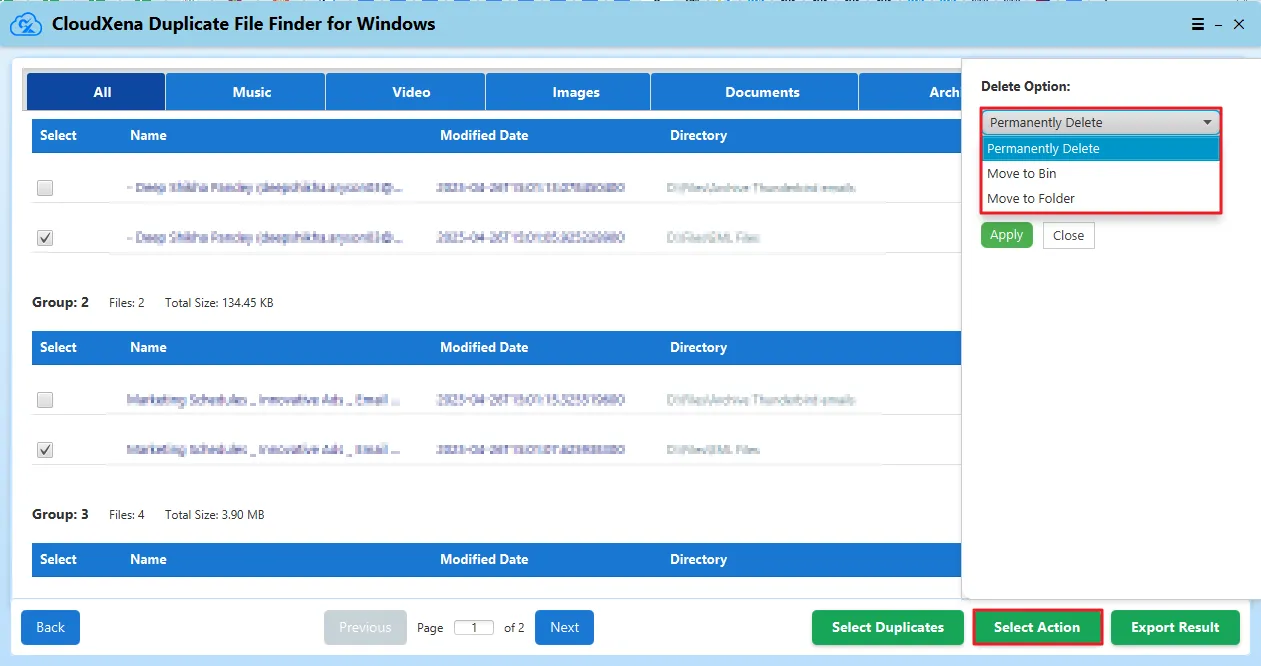
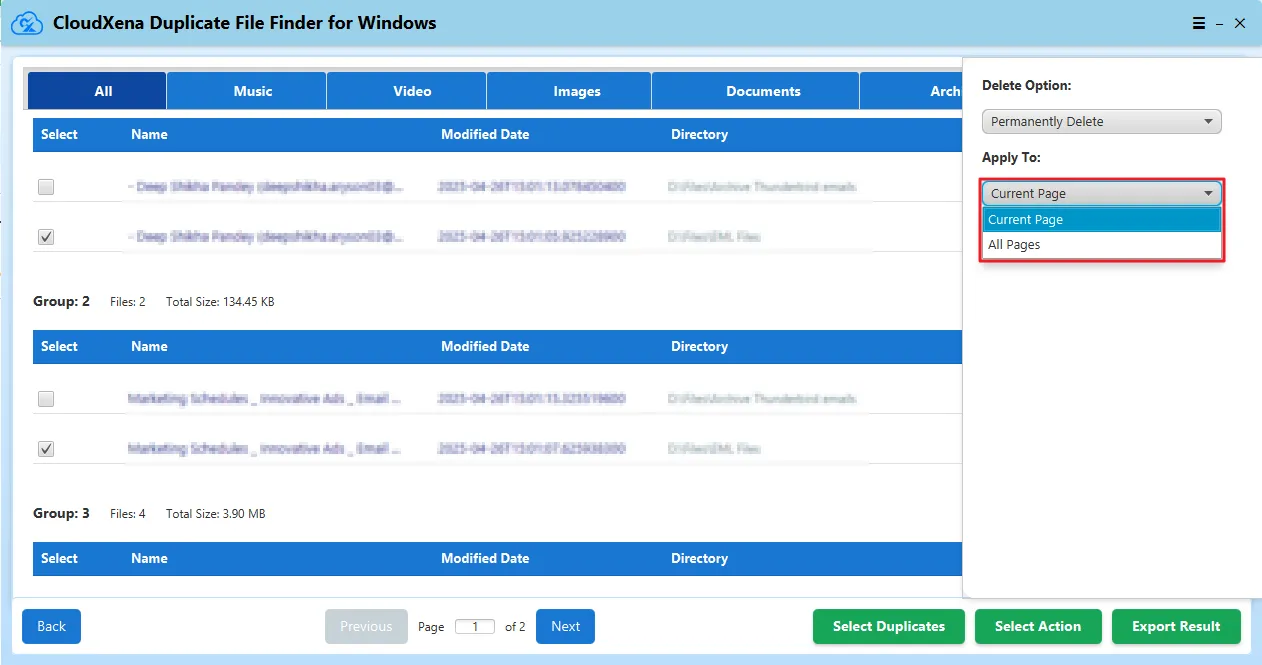
17:Under the Apply to section, choose whether to apply your selected action to the Current Page or All Pages.
18: Click Apply, then use the Export Result option to save a report of your duplicate scan and removal results.
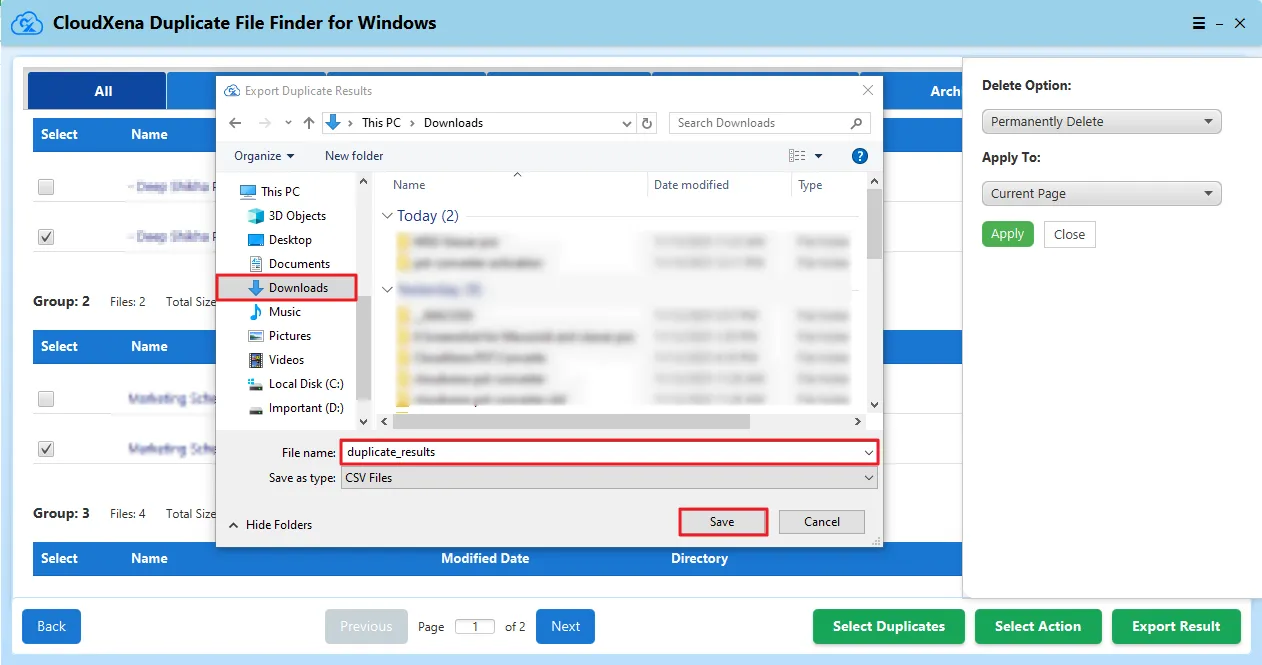
19: Choose a location to save the report in CSV format. Enter a file name and click Save.
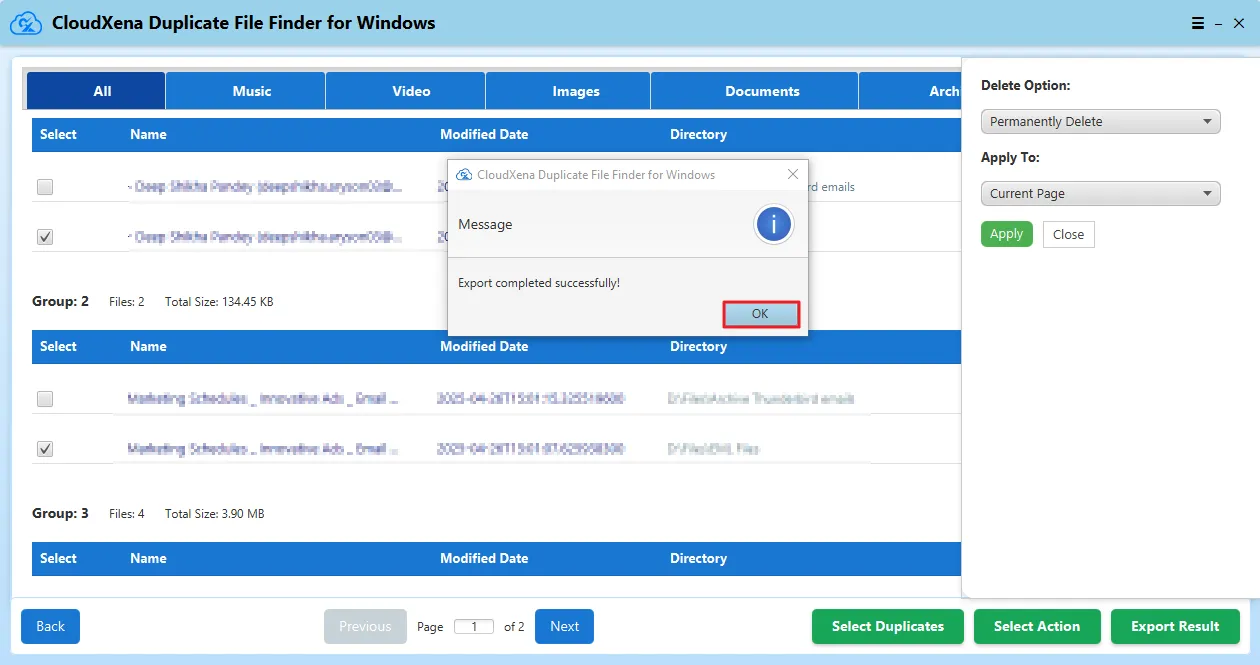
20: Once the process is completed as per your selected actions, you’ll see a confirmation message. Click OK to finish and close the software.
Activate the Software
Installation & Uninstallation
Download the step-by-step installation or uninstallation PDF guides below:
Windows Installation Windows UninstallationUser Interface
Once you launch the CloudXena Duplicate File Finder for Windows, you will see the following interface.
