- Software Working Process
- User Interface
Software Working Process
1: Download, install, and launch the CloudXena EML Converter Tool on your system.

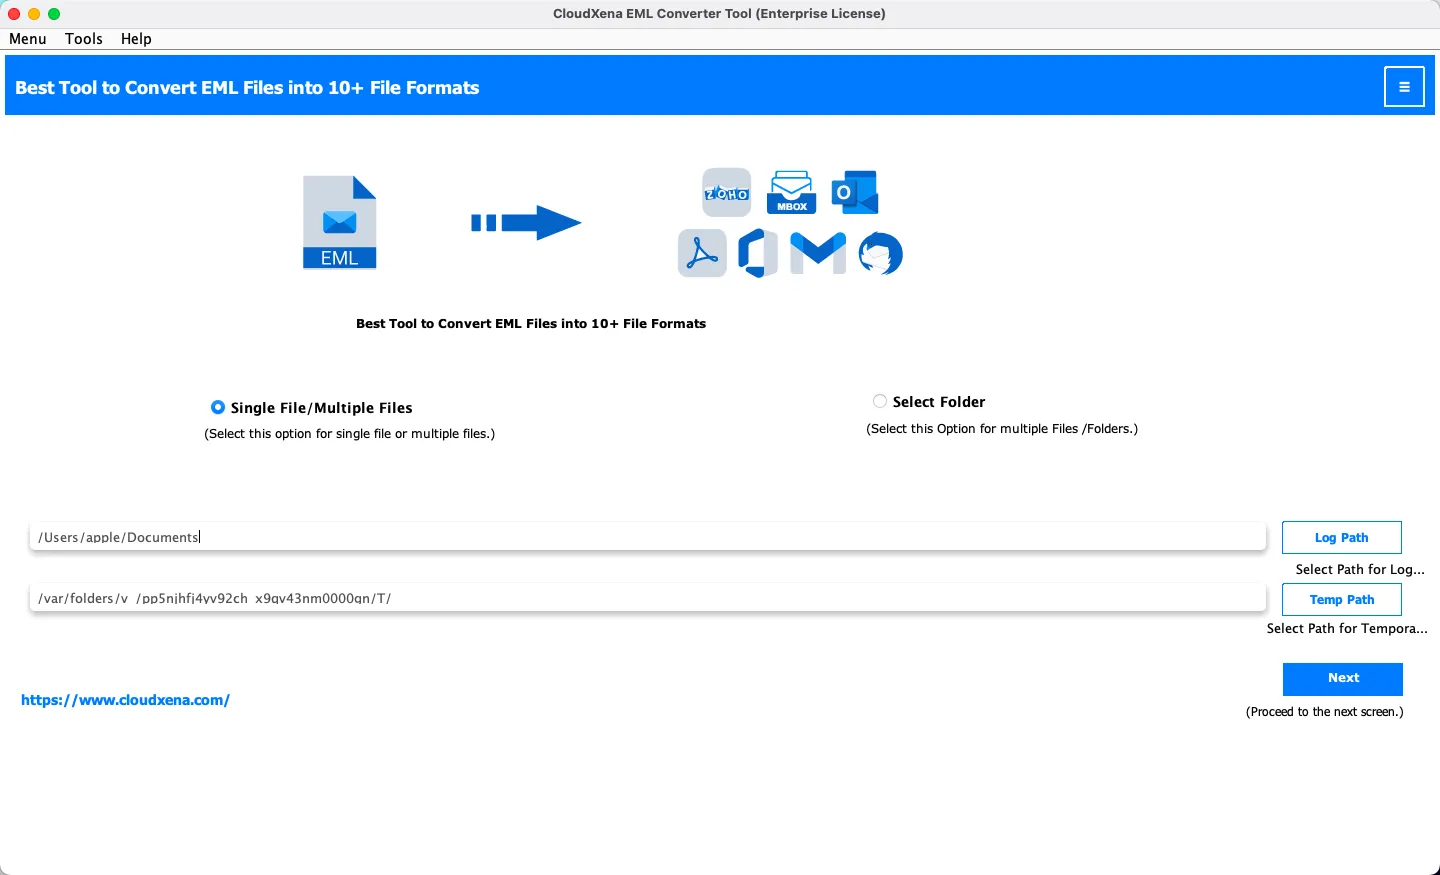
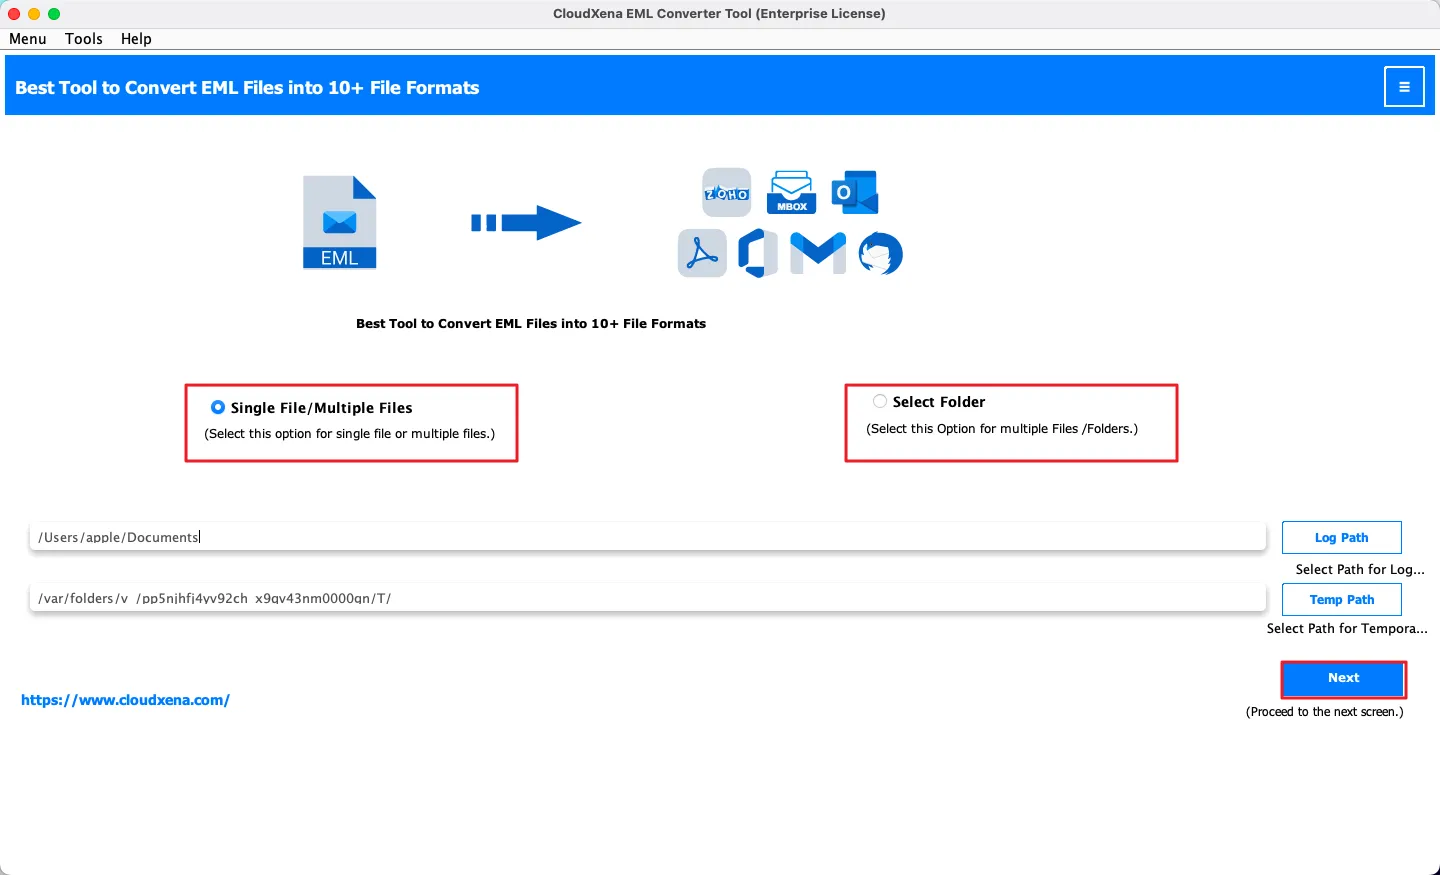
2: Choose Select File/Multiple Files or Select Folder, depending on how you want to add your EML data. Click Next to continue.
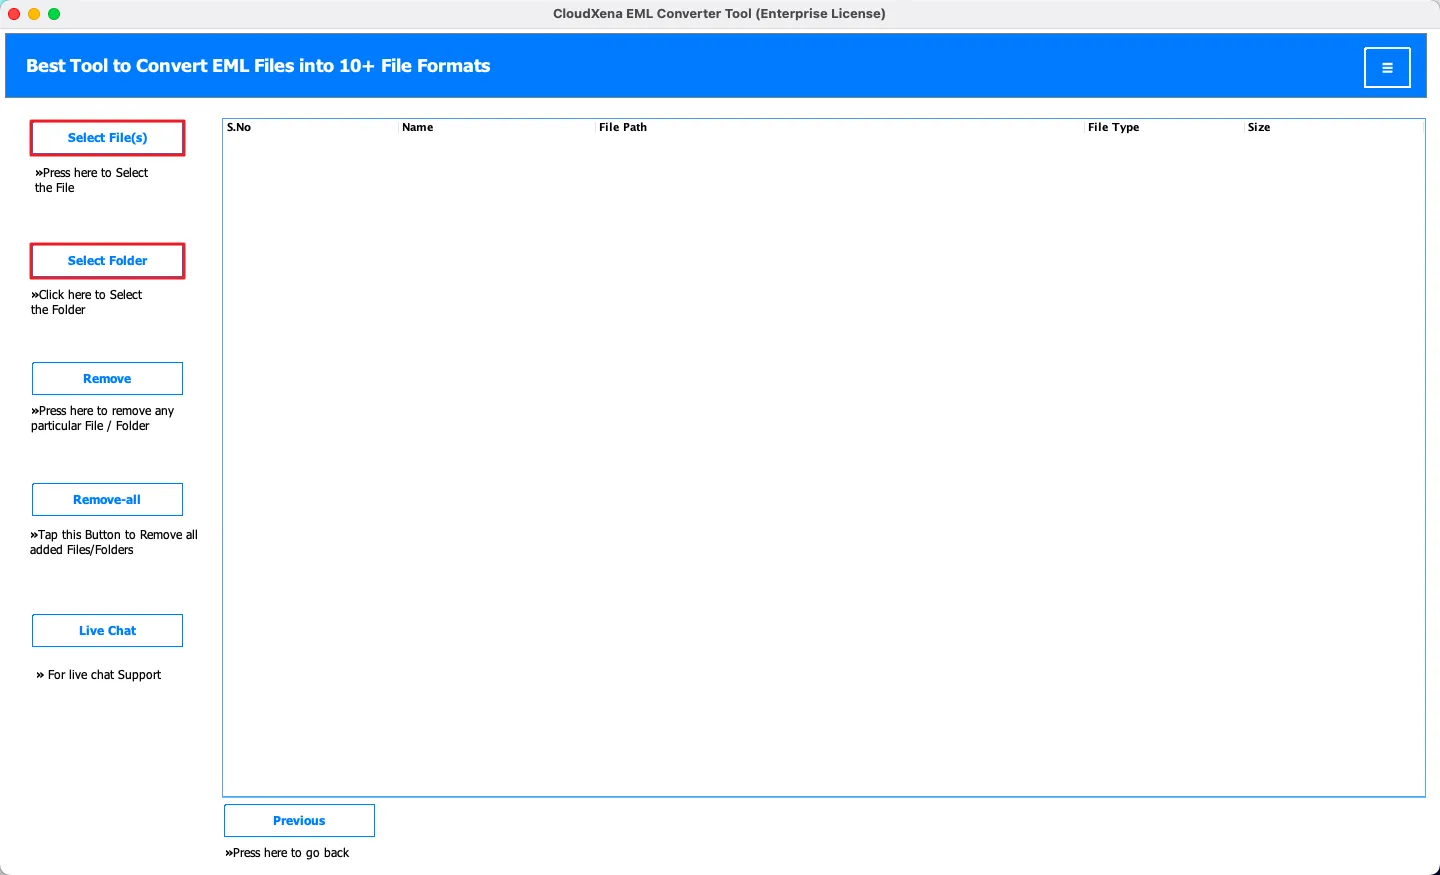
3: Now, click Select File or Select Folder to start browsing your EML files.
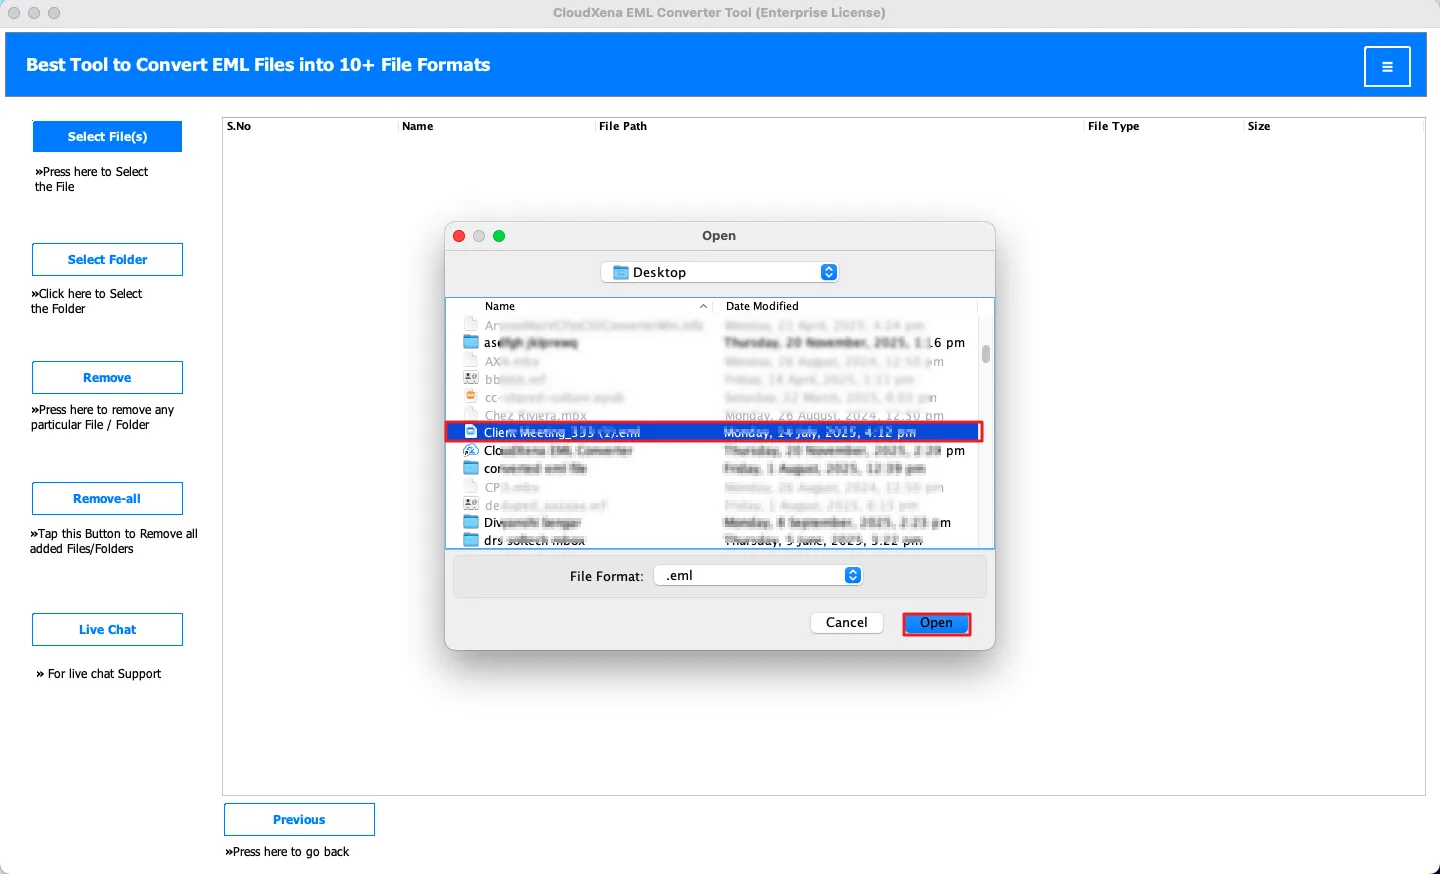
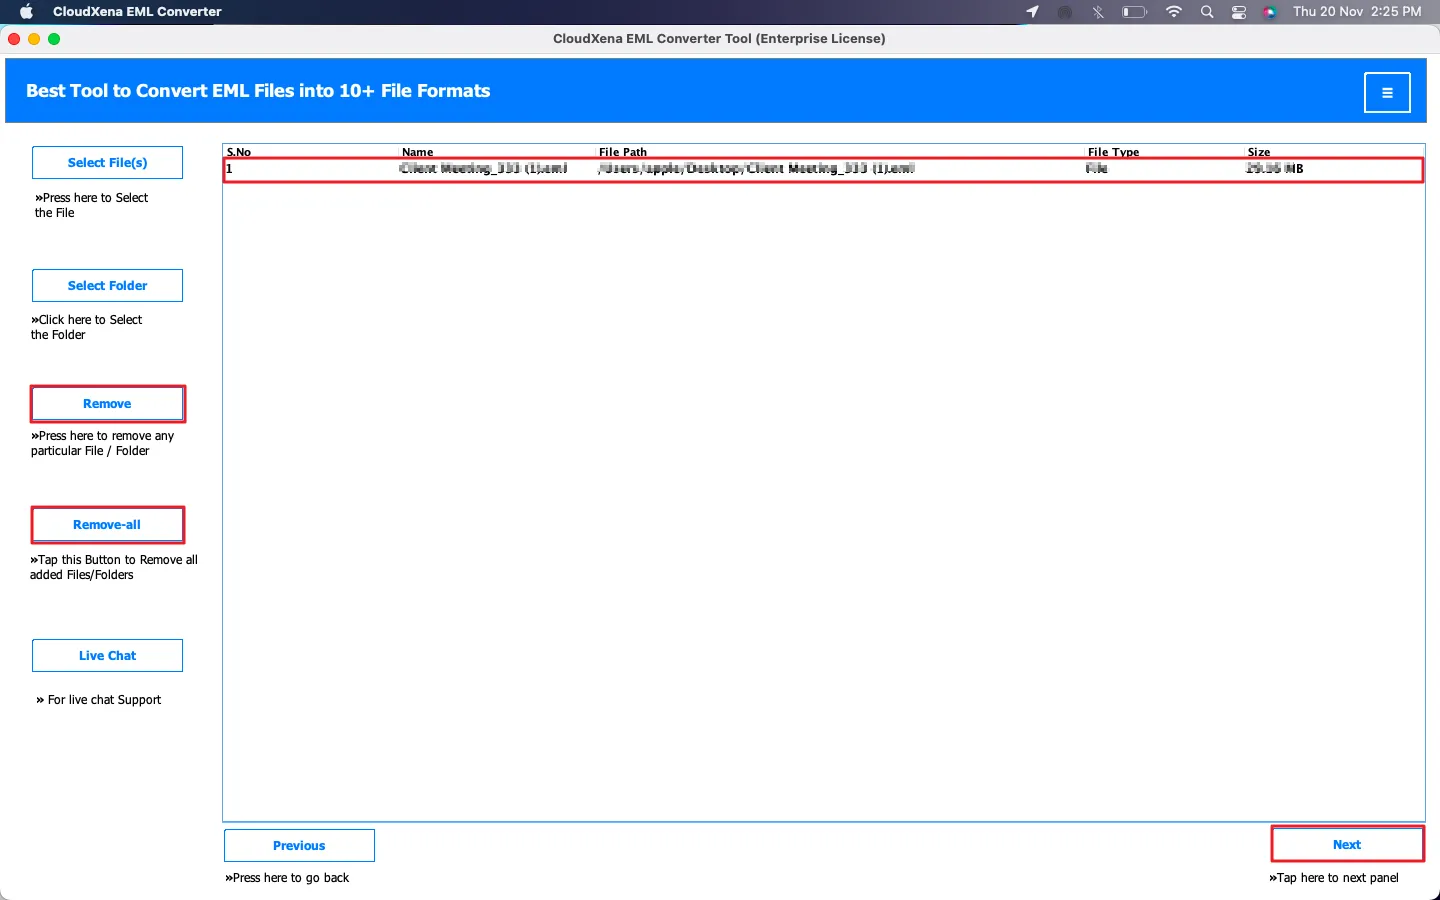
4: Now, select the EML files or the entire folder you want to import, and click Open to add them to the software.
5: If needed, use the Remove or Remove All option to delete any unwanted files from the list. Once finalized, tap Next.
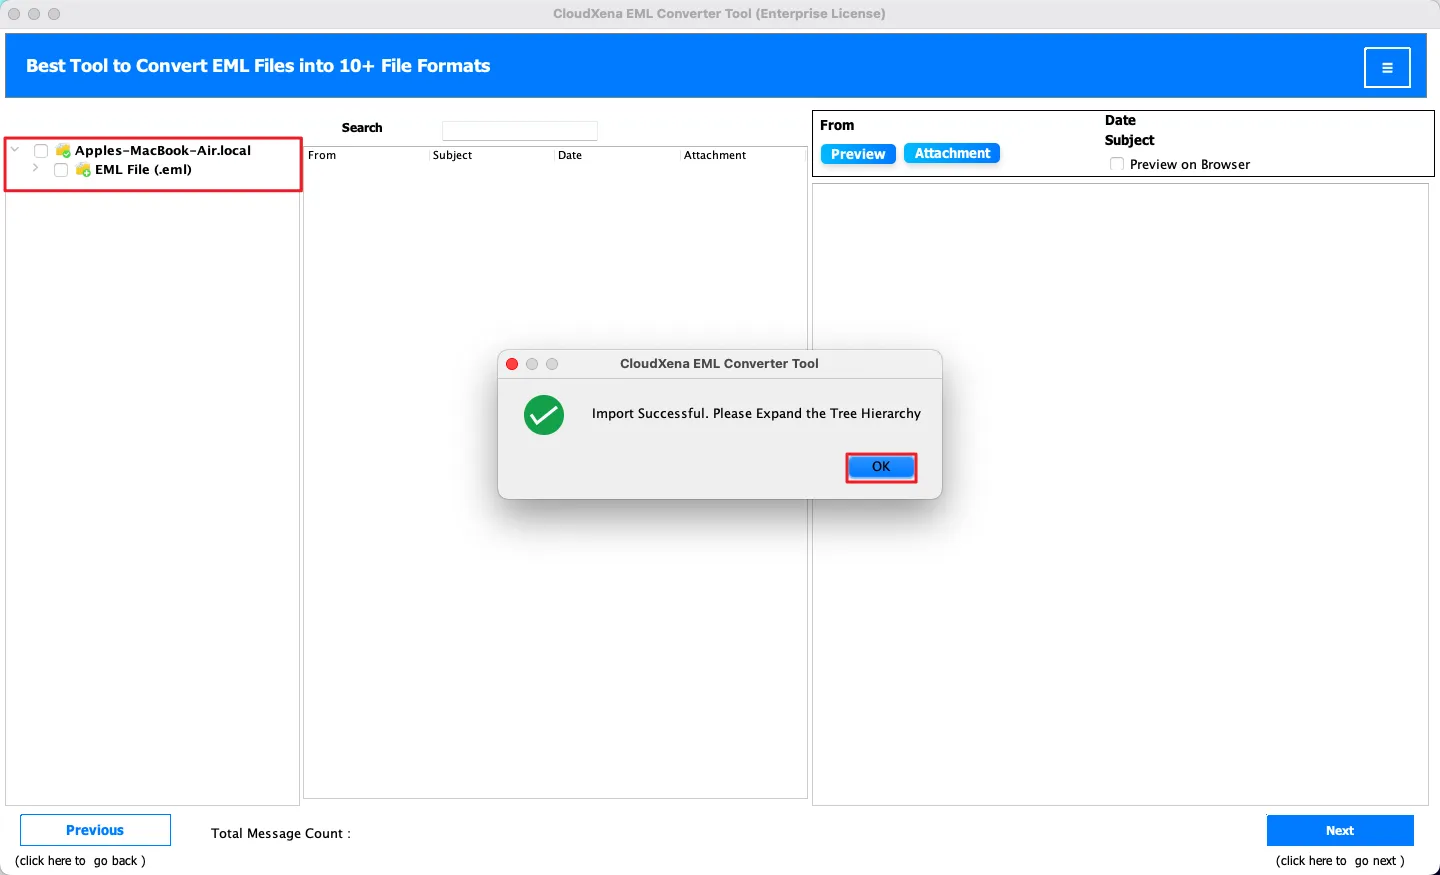
6: Click OK to load the mailbox and let the tool display the complete folder hierarchy.
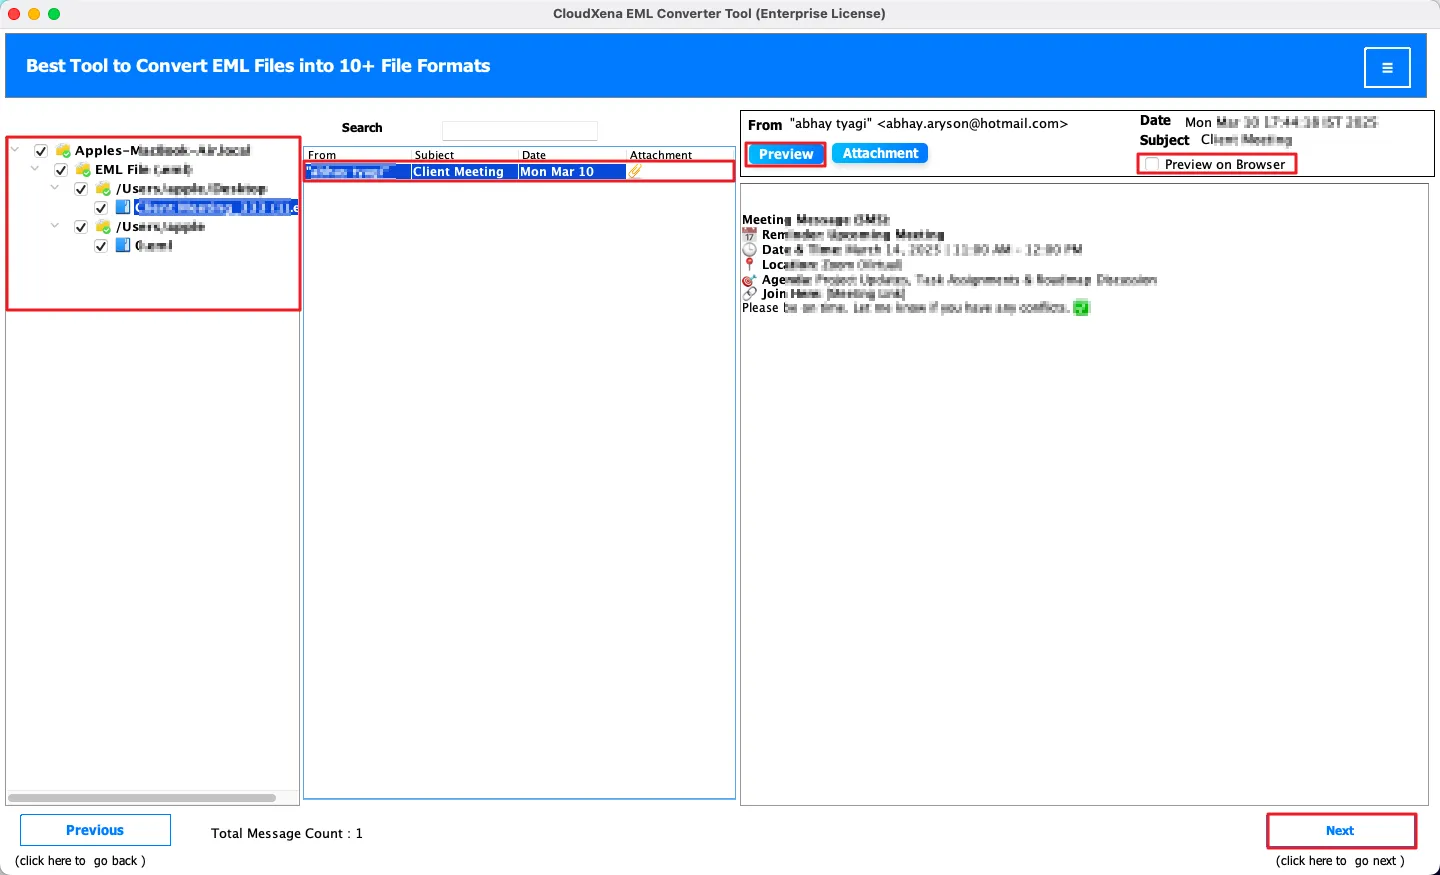
7: Select any email from the folder tree to preview its content. Use Preview or Preview in Browser, then click Next again.
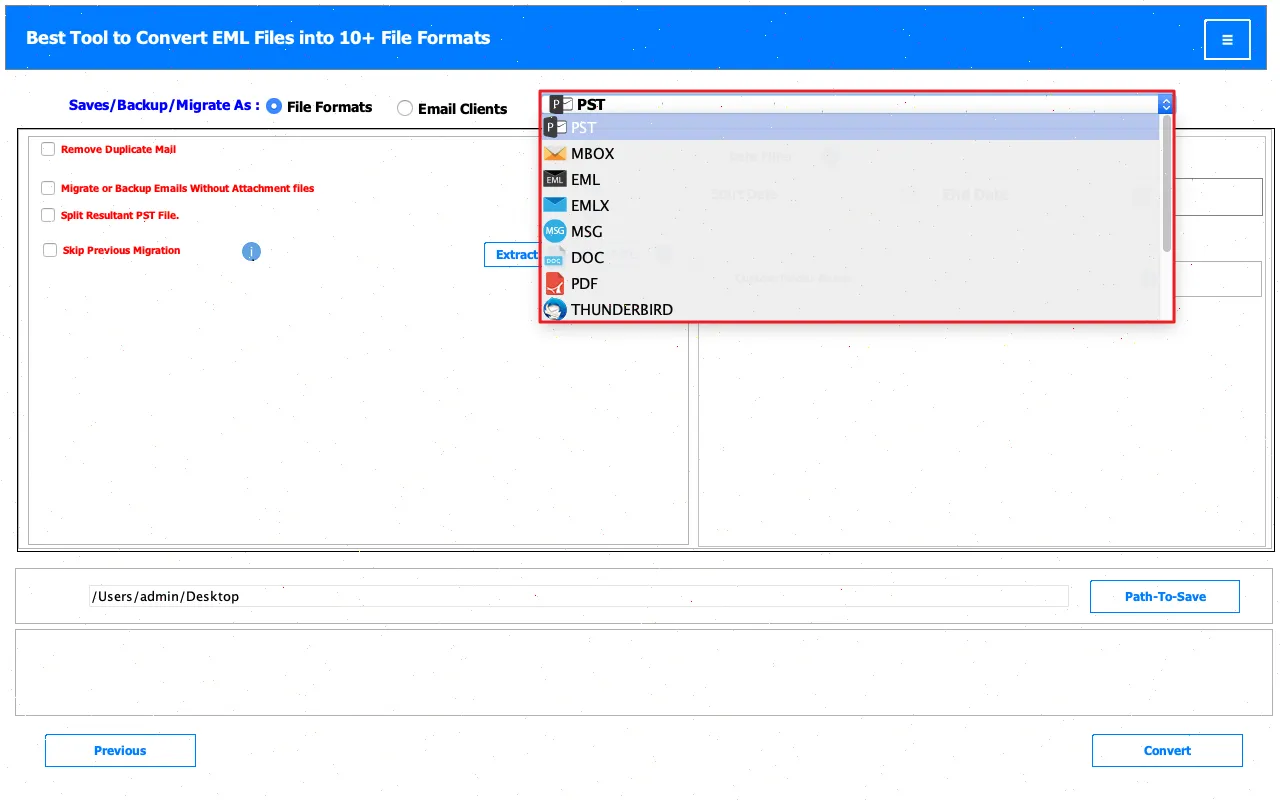
8: You can select any one from the given list of File Formats to convert EML files into.
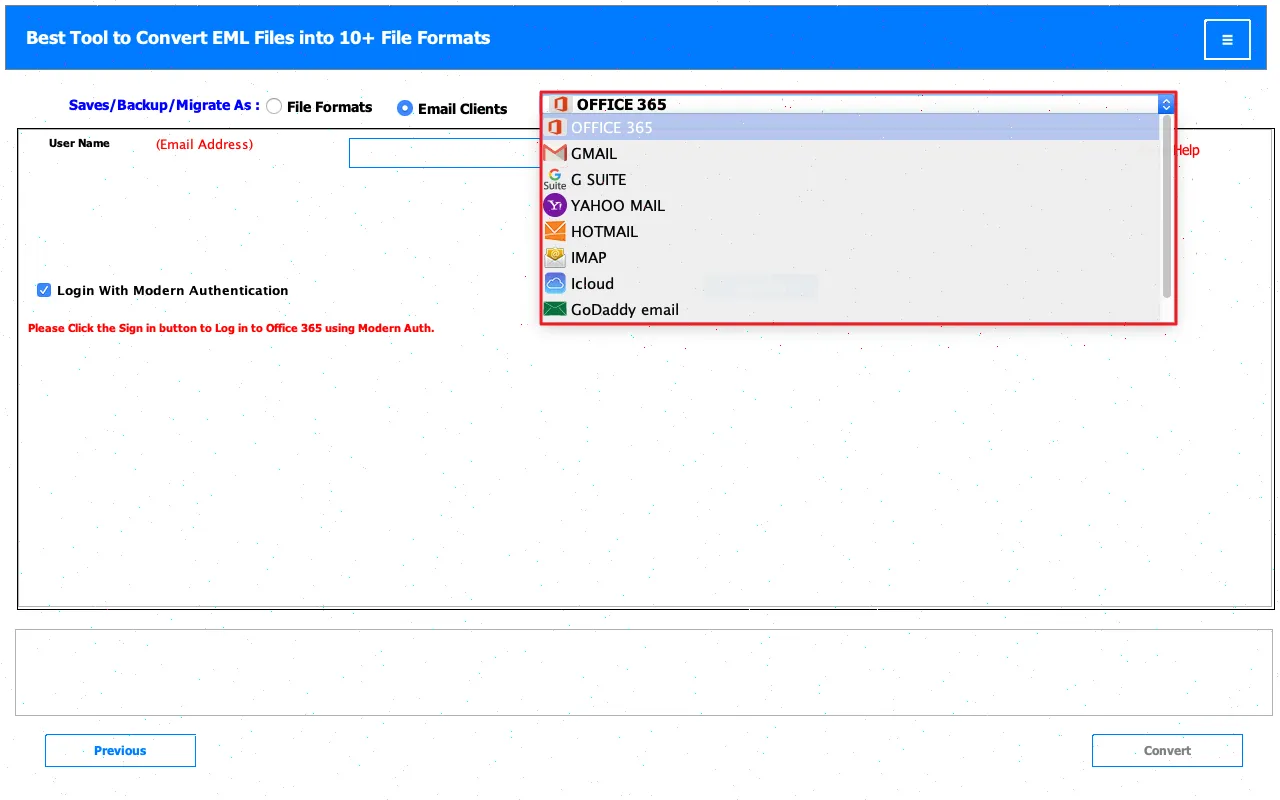
9: You can also select any Email Client in which you want to migrate your EML files. Simply login with your credentials and move on.
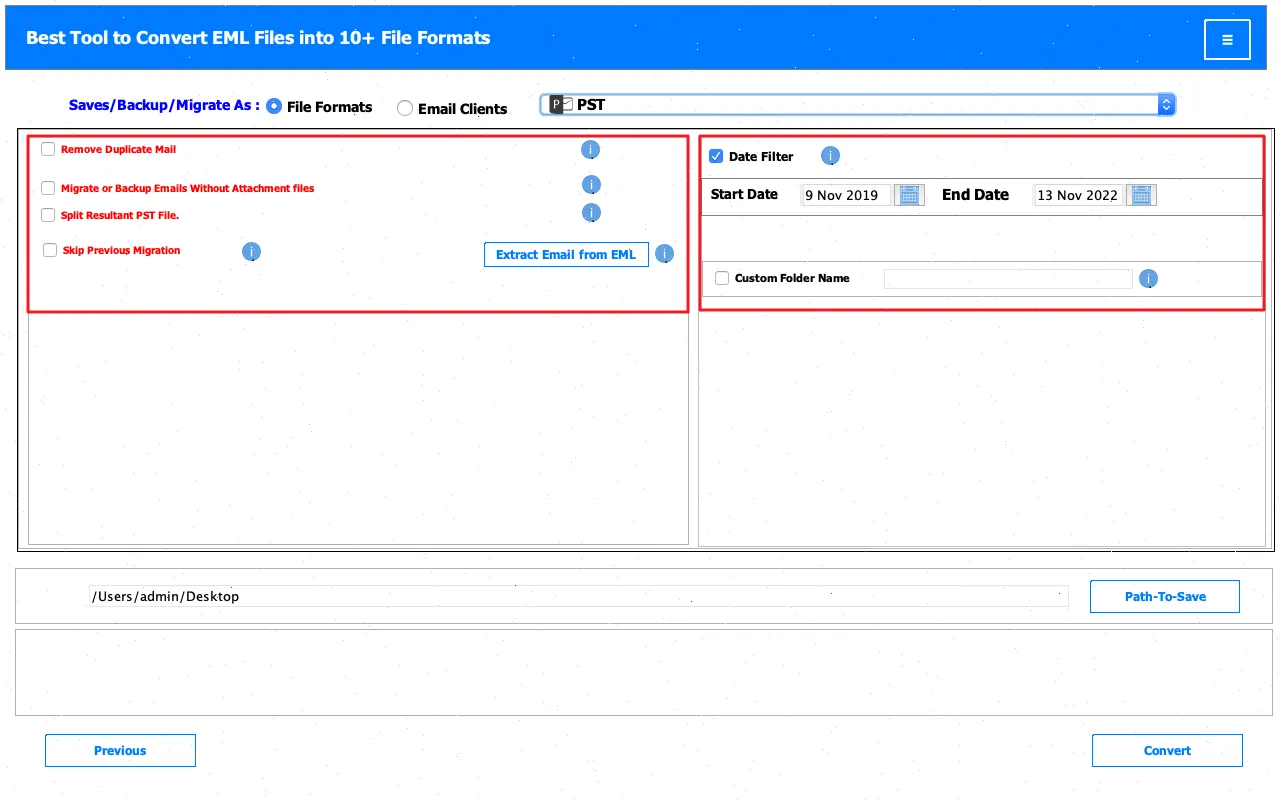
10: Here, we have selected PST as the Output File Format. After selection, apply advanced features and filters as needed.
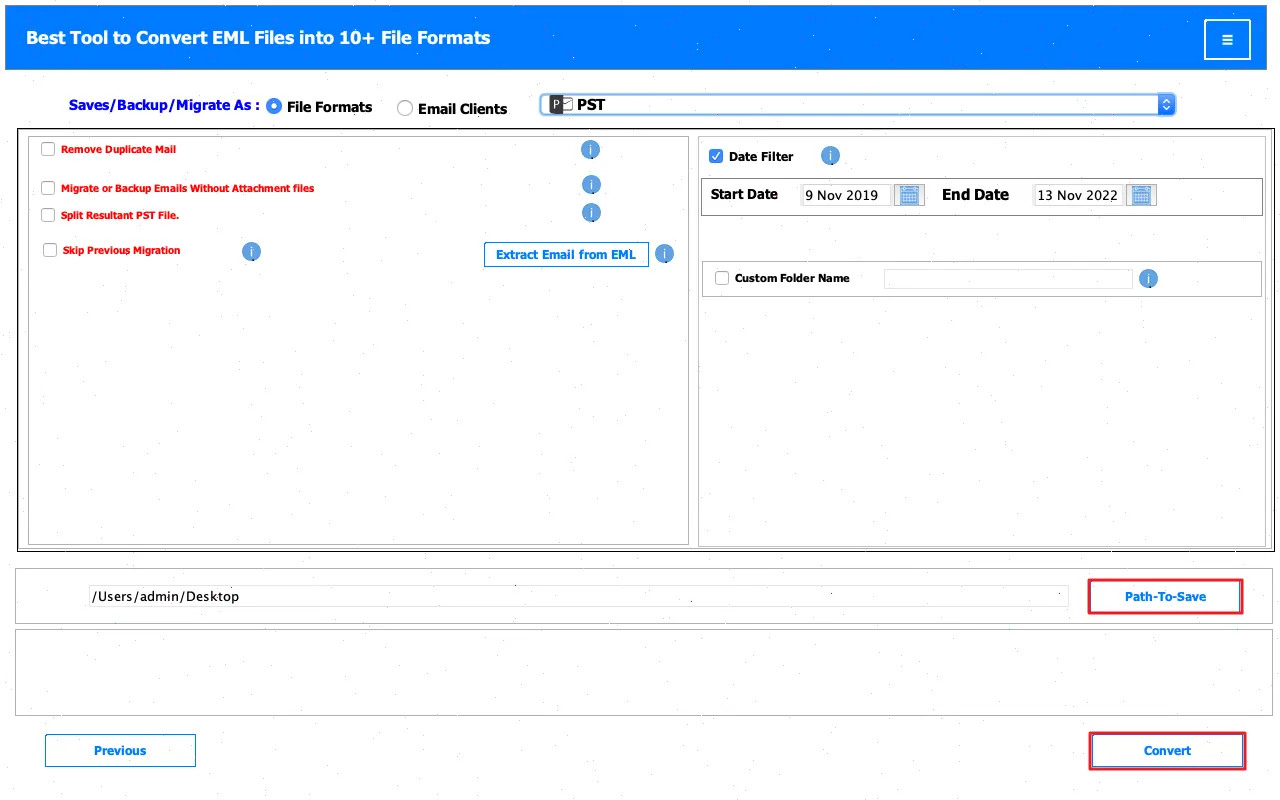
11: After that, choose the destination Path to Save and click the Convert button to start the migration process.
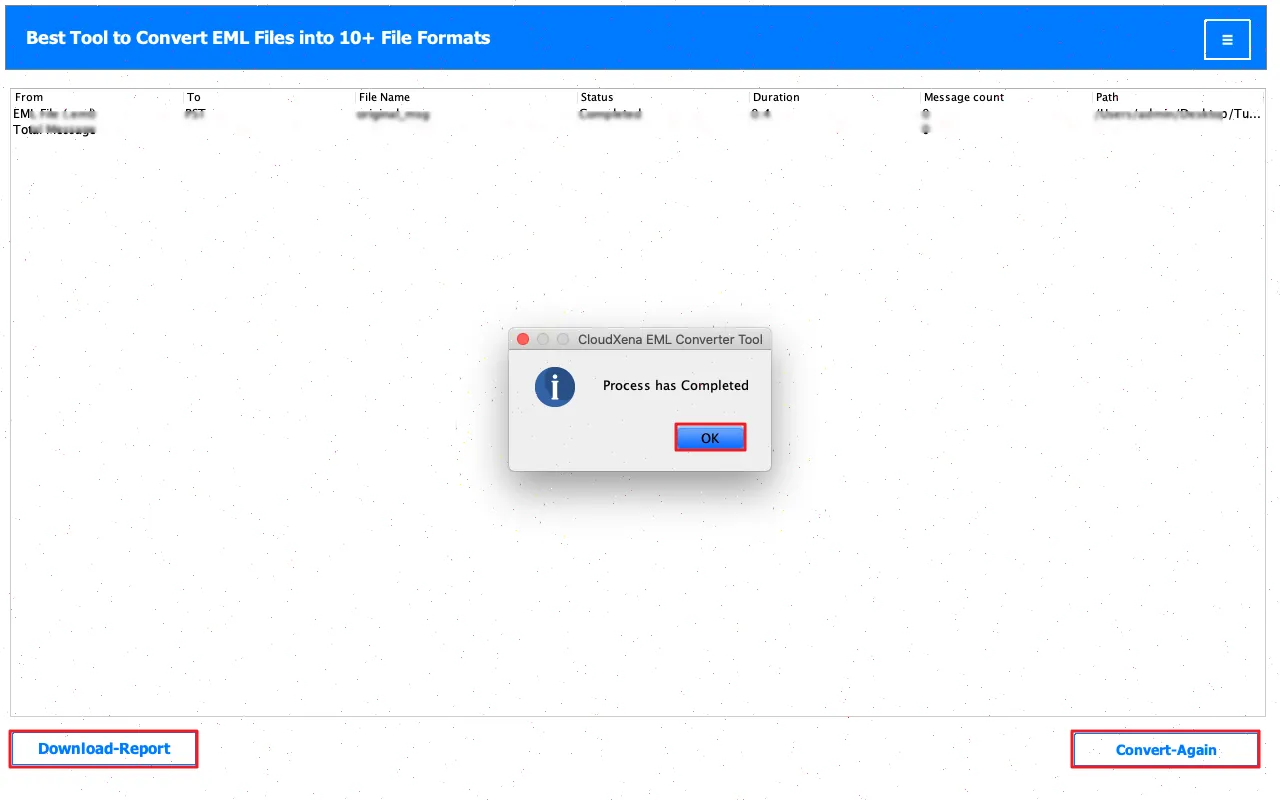
12: Once the process is complete, either click Download Report or Convert Again if needed.
Activate the Software
Installation & Uninstallation
Download the step-by-step installation or uninstallation PDF guides below:
Windows Installation Windows UninstallationUser Interface
You will see the following interface once the tool launches.