- Software Working Process
- User Interface
Software Working Process
1: Download and open the CloudXena OST to PST Converter Tool on your system.
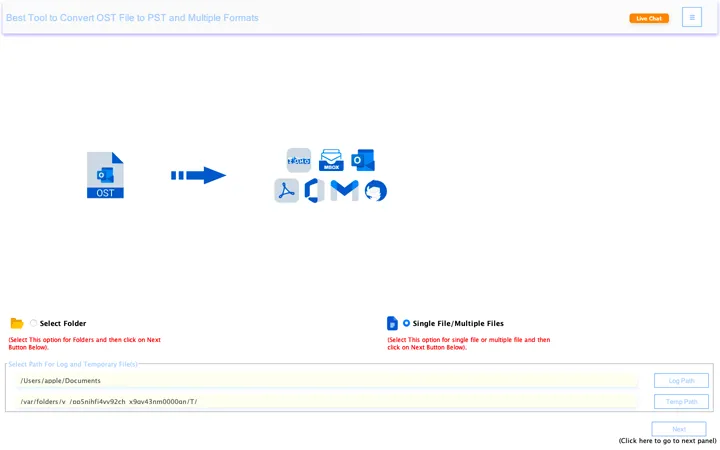
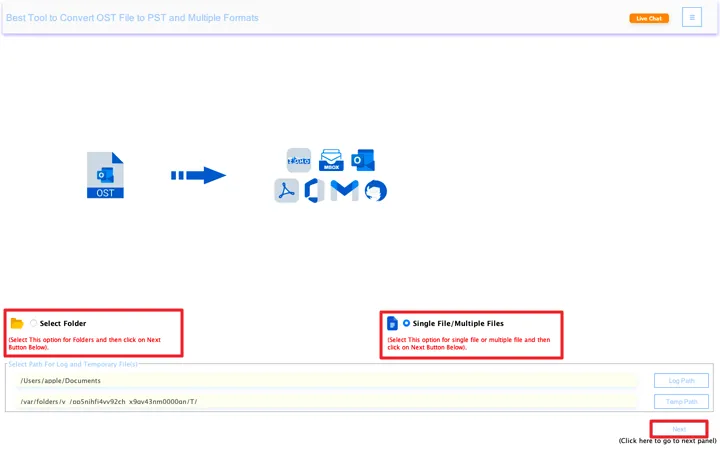
2: You will see two options: Select Folder or Select Single/Multiple Files. Choose the option based on your requirement, then click Next to continue.
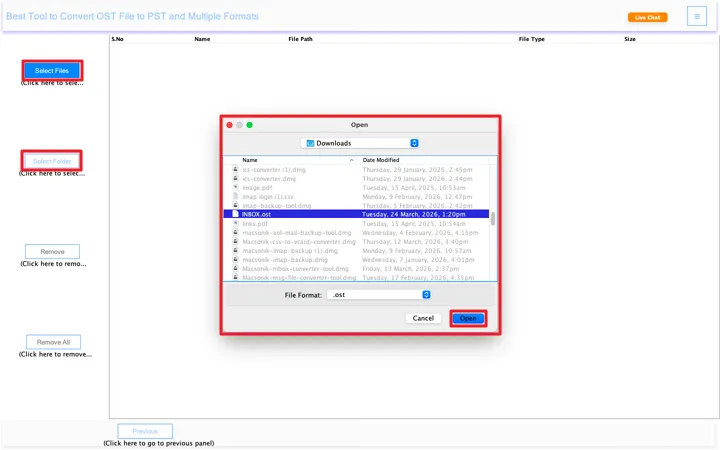
3: Next, click on Select File or Select Folder to browse your OST files. Once selected, click Open to add them to the software.
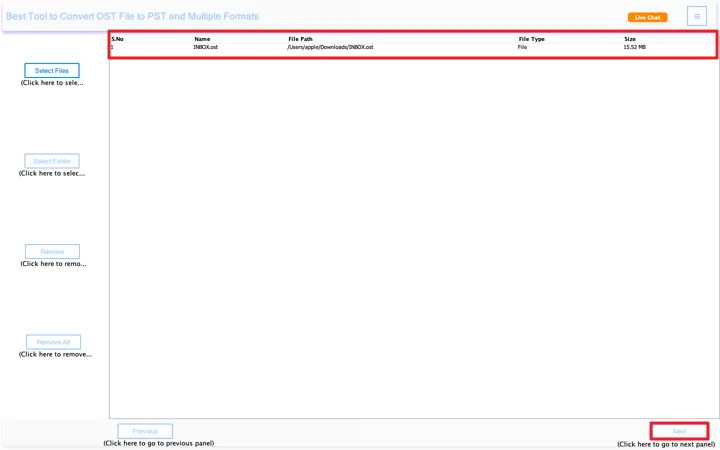
4: Once you’ve selected all the required OST files, click Next to move ahead.
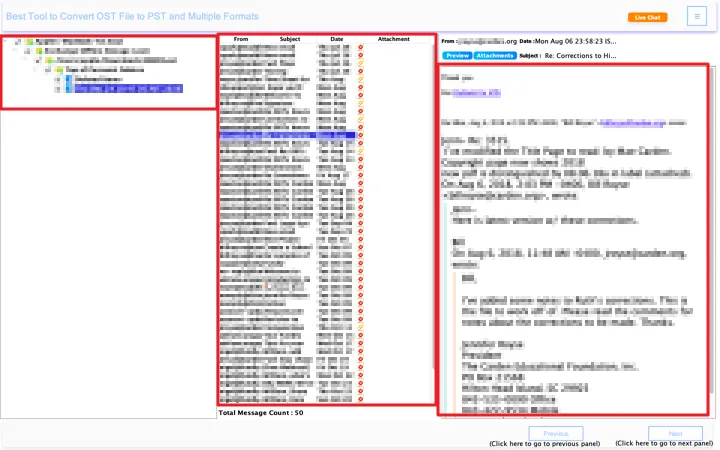
5: The tool will scan the added files and show all items in a tree view. You can double-click any item to preview emails along with their attachments.
6: After that, select the required folders for conversion by checking them, then click Next to proceed.

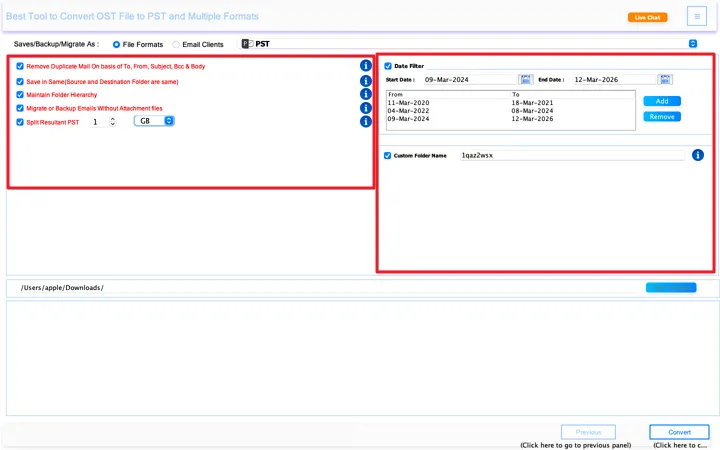
7: First, go to the File Format option and select PST from the Save/Backup/Migrate As drop-down menu.

8: In this step, you can apply different filters based on your needs before starting the conversion:
- Remove Duplicate Mail – This helps skip duplicate emails based on fields like To, From, Subject, CC, and Body, so you don’t get repeated data.
- Save in Same (Source and Destination) Folder – Keeps the same folder structure in the output as it was in the original file.
- Maintain Folder Hierarchy – Ensures all folders and subfolders stay organized exactly like the source.
- Migrate or Backup Emails Without Attachments – Exports only email content and skips attachments to reduce file size.
- Split Resultant PST – lets you divide large PST files into smaller sizes (you can set the size in GB and MB).
- Date Filter – Allows you to export emails from a specific date range only, so you don’t move unnecessary data.
- Custom Folder Name – You can rename the output folder as per your preference.
After applying the required filters, you can move ahead with the conversion process.
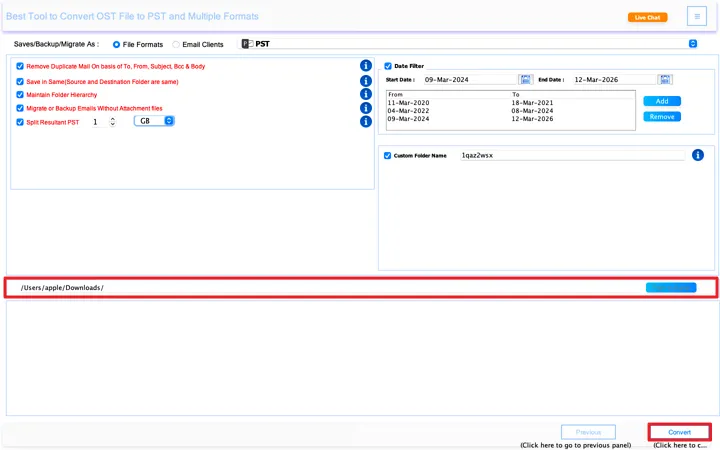
9: Next, choose the destination path where you want to save the converted PST file by clicking on the Browse button. Select the location on your system and confirm it. After that, click on the Convert button to start the conversion process.
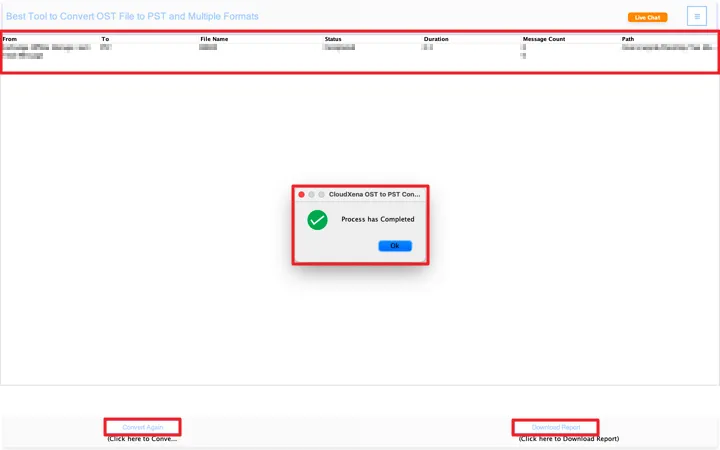
10: Once the conversion process is complete, the software will show a confirmation message saying “Process has Completed.” Click on OK to close the message.
At the top, you can see a summary panel with details like file name, status, duration, message count, and save path. This helps you quickly check if everything was converted properly.
If you want to run the process again, you can click on Convert Again. You also have the option to download a detailed log by clicking on Download Report, which gives you a complete record of the conversion.
Activate the Software
Installation & Uninstallation
Download the step-by-step installation or uninstallation PDF guides below:
Windows Installation Windows UninstallationUser Interface
Once you launch the CloudXena OST to PST Converter, you will see the following interface.